FlopZ the Chubby Bunny- Free Crochet Pattern
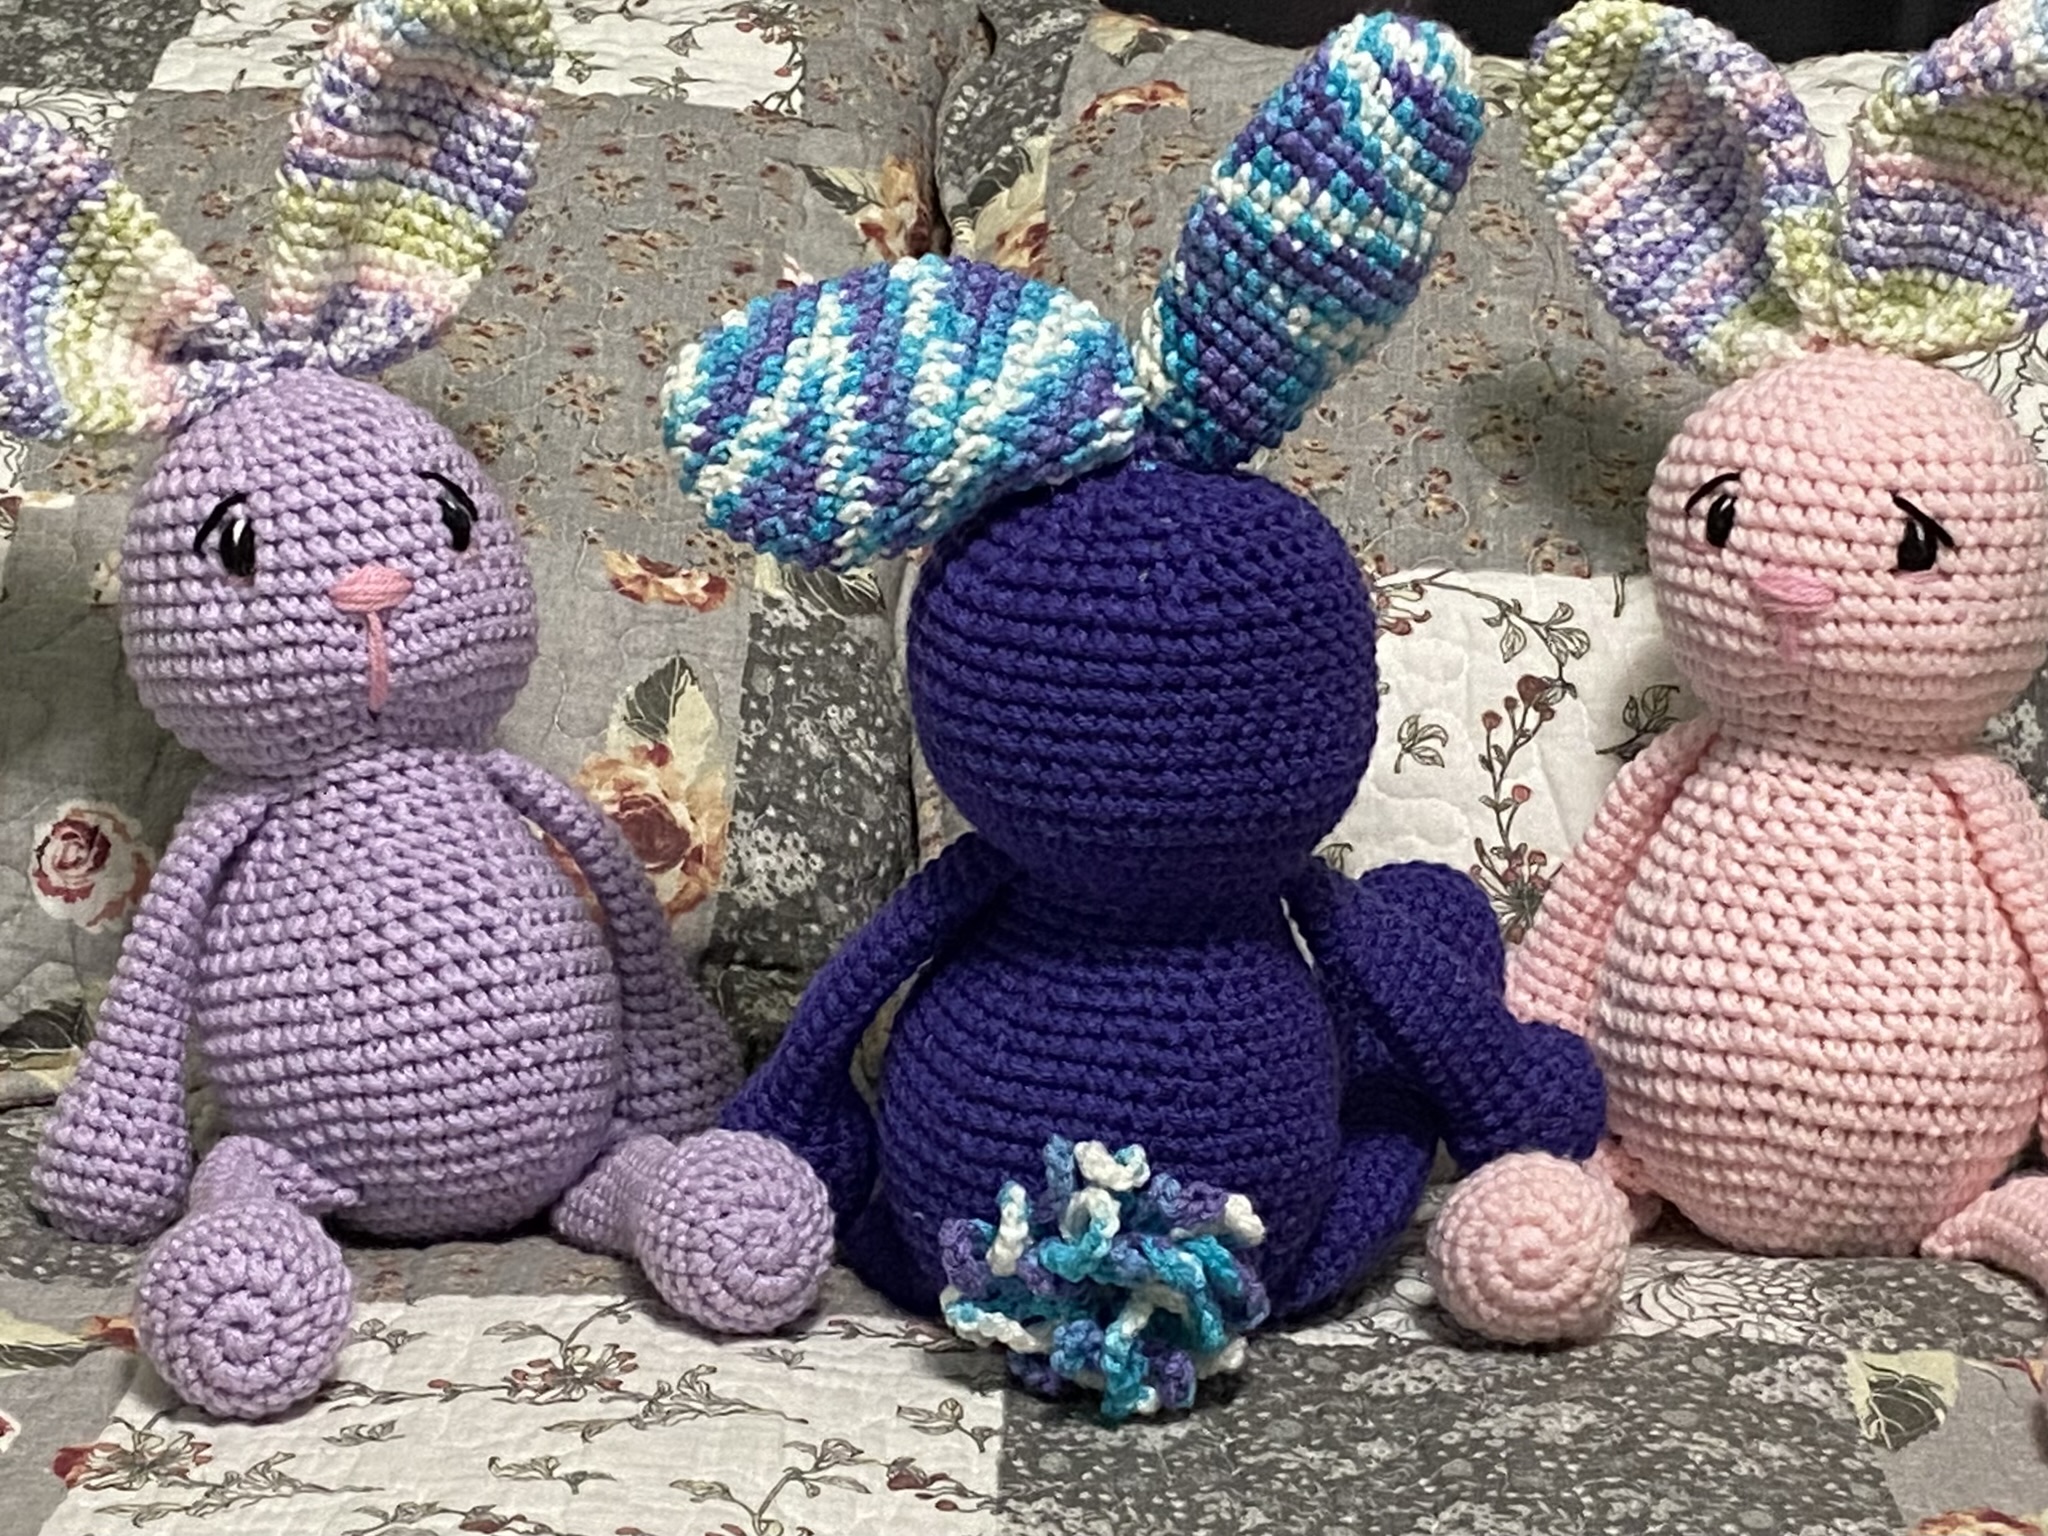
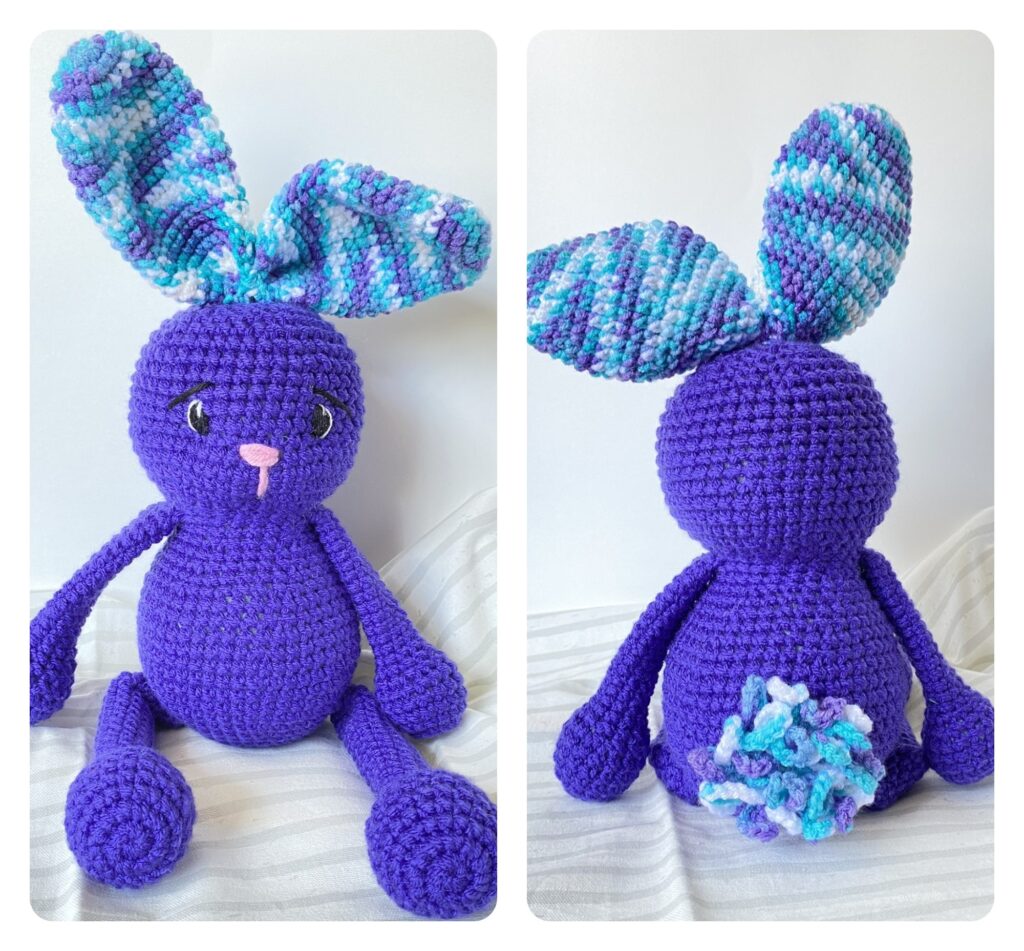
Even though I’m the WhimZ “B”, I love bunnies! I really love making different little crochet bunnies. When I began this chubby pattern a couple of years ago, it was going to be another shelf sitter. This year I decided to make it into a toy. With it’s long, dangly arms and legs, it’s perfect for little ones to wag around and can be made to sit up. This bunny would make a wonderful gift and would sell well at markets. The stitched on eyes make it baby safe too. And best of all, this is a FREE bunny crochet pattern!
I really love the way the ears flop on this bunny (hence the name FlopZ) and the chubby bunny body. The variegated yarn adds the perfect touch to the ears and tail, making this bunny a unique creation.
About this pattern
This pattern is for an advanced beginner in crochet or a crocheter who is beginning in amigurumi. It is worked using single crochet stitches in the round with no joins. The body is constructed by crocheting the legs and arms on as the body is crocheted. The ears and tail are sewn on. The facial features are stitched on after some facial sculpting is done. Finished, the bunny is approximately 20in long!
(UPDATED 4.27.2024 This revision staggers the INCs and DECs so that the slanted lines are eliminated.)
This pattern is protected by copyright and cannot be sold or reproduced by any means. You are NOT allowed to share this pattern, but you ARE allowed to share the link to this website. MY photos are not allowed to be shared, but you ARE allowed to share photos of YOUR completed project. Video tutorials of this free pattern are NOT allowed. Selling finished items is permitted and encouraged. Please give credit for the pattern to me when sharing your creations on social media.
I used I Love This Yarn from Hobby Lobby for all my FlopZs.
Use the “yarn under” method for amigurumi.
Check it out my YouTube playlist for this pattern HERE.
You can also purchase a printable PDF of this pattern in my Etsy Shop at a discounted price.
Supplies
- Hook: F (3.75mm)
- Yarn: 4-Medium weight. You will need colors for the following: (Words in Bold are how colors are referred to in the pattern.)
- Body solid color (approx. 3 1/2 oz.)
- Ears/ Tail variegated yarn (approx. 2 oz)
- Nose (pink or your choice)
- Black (or other color chosen for eyes)
- White
- Stuffing
- Yarn needle
- Stitch Marker
- Pins for marking
Terms
R or RNDS: round/rounds
MR: magic ring
INC: increase
SC: single crochet
DEC: decrease (I use the invisible decrease)
ST(S): stitch/stitches
SLST: slip stitch
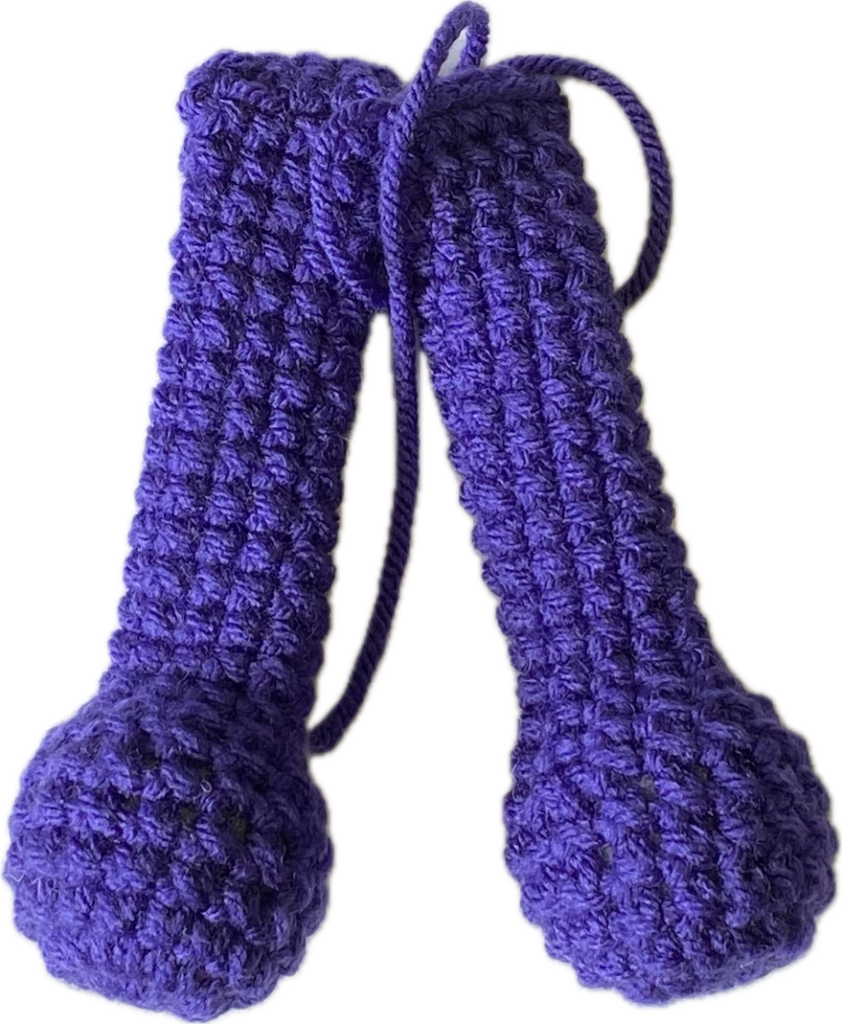
Arms
Make 2
R1: With Body, MR 8SC (8)
R2: INC around (16)
R3-6: SC around (4 rnds of 16)
R7: *SCx2, DEC* around (12)
R8: *SCx4, DEC* around (10)
Stuff hands only.
R9-23: SC around (15 rnds of 10)
R24: Pinch together and SC across (5) Tie off. Leave an approx. 4” tail.
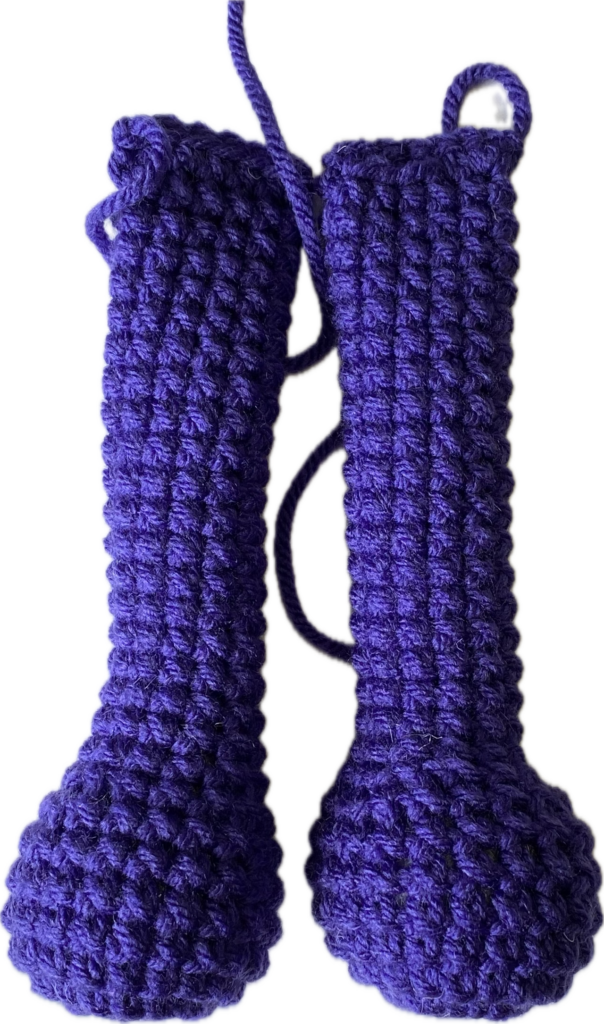
Legs
R1: With Body, MR 10SC (10)
R2: INC around (20)
R3-7: SC around (5 rnds of 20)
R8: **SCx3, DEC* around (16)
R9: *SCx2, DEC* around (12)
Stuff feet, but do not overstuff.
Stuff ⅔ of each leg very lightly.
R10-28: SC around (19 rnds of 12)
Pinch together and SC across (6) Tie off. Leave an approx. 4” tail.
Body
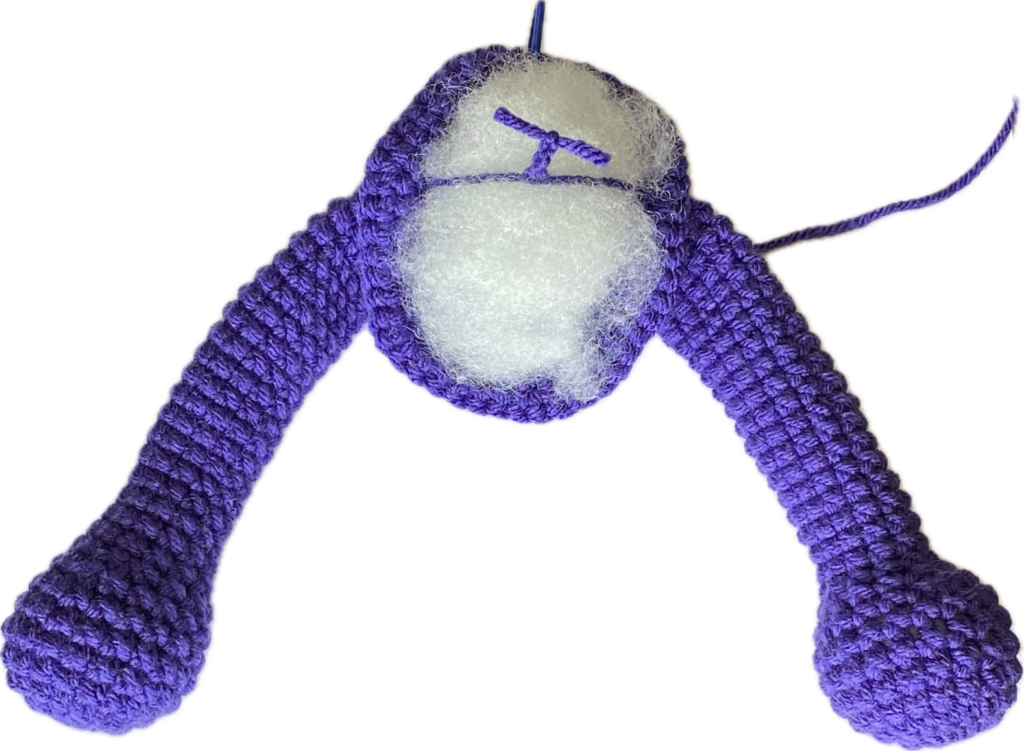
R1: With Body, MR 6SC (6)
R2: INC around (12)
R3: SC, INC around (18)
R4: SC, INC, *SCx2, INC*x5, SC (24)
R5: *SCx3, INC * around (30)
R6: SCx2, INC, *SCx4, INC*x5, SCx2 (36)
R7: *SCx6, SCx6 (attaching leg), SCx12, SCx6 (attaching leg), SCx6 (36)
R8: *SCx5, INC* around (42)
R9: SCx3, INC, *SCx6, INC*x5, SCx3 (48)
Pull tails from legs inside the body and tie together. Be careful not to pull them in too tight. Insert a small wad of stuffing under the knot. Tie ends in multiple double knots to help secure.
R10-12: SC around (3 rnds of 48)
R13: *SCx7, INC* around (54)
R14: SC around (54)
R15: *SCx7, DEC* around (48)
R16: SC around (48)
R17: SCx3, DEC, *SCx6, DEC*x5, DEC (42)
R18: SC around (42)
R19: *SCx5, DEC* around (36)
R20: SC around (36)
R21: SCx2, DEC, *SCx4, DEC*x5, SCx2 (30)
R22: SC around (30)
R23: *SCx3, DEC* around (24)
R24: SC around (24)
R25: SC around, crocheting on arms directly above the legs. There should be 7sts between each arm on both sides. (24)
R26: SC around (24)
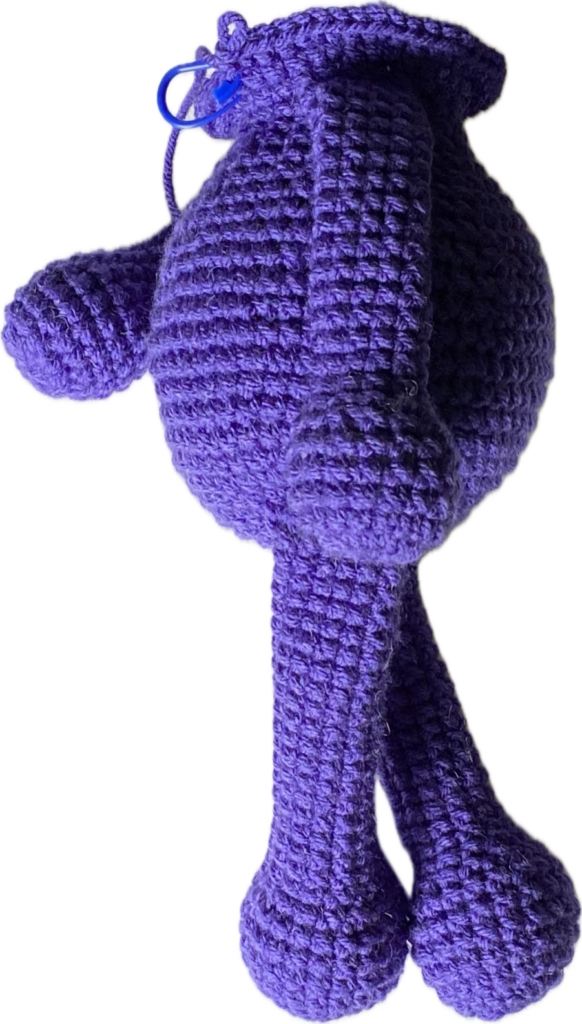
Stuff the body up to this point, but be careful not to overstuff.
Pull tails from arms inside the body and tie together in multiple double knots to help secure. Be careful not to pull them in too tight so that the body is distorted.
Head
R27: *SCx1, INC* around (36)
R28: SC, INC, *SCx2, INC*x11, SC (48)
R29-31: SC around (3 rnds of 48)
R32: SCx3, DEC, *SCx6, DEC*x5, SCx3 around (42)
R33-38: SC around (6 rnds of 42)
Make sure to stuff the head and neck firmly (but don’t overstuff) as you go.
R39: *SCx5, DEC* around (36)
R40: SCx2, DEC, *SCx4, DEC*x5, SCx2 (30)
R41: *SCx3, DEC* around (24)
R42: SC, DEC, *SCx2, DEC*x5, SC (18)
R43: *SC, DEC* around (12)
R44: DEC around. (6)
Cut a tail and weave in and out around the opening. Pull tight to close. Tie off.
Choose which side will be the front. I base it on how the arms are laying.
Head Sculpting
Use pins to mark sts for sculpting. First place a pin at the top of R27 in the center st. Next, mark the eye sockets. They will be between R33-34 and about 7 or 8 sts apart (use the center pin for reference).
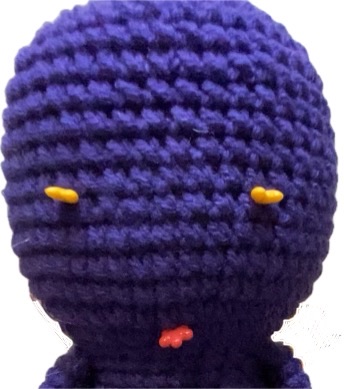
With Body, cut a long length and thread it in your needle. Insert into the front, center st of R27 (pink pin). Leaving a 3” tail, take the needle through the stuffing and come out at one of the yellow pins. Insert needle one st to the outside and take needle through the stuffing to the other yellow pin. Pull tight holding onto both yarn ends. Insert needle one st to the outside and come out in the st at the pink pin. Pull both yarn ends tight and tie into a knot. This creates eye sockets and starts to form the nose.
Inset needle directly above between R32-33. Pull tight and repeat. Come out at the beginning st. Tie tails in a double knot then pull them through the head to another spot. Pull taut and trim. This creates the cheeks.
Eyes
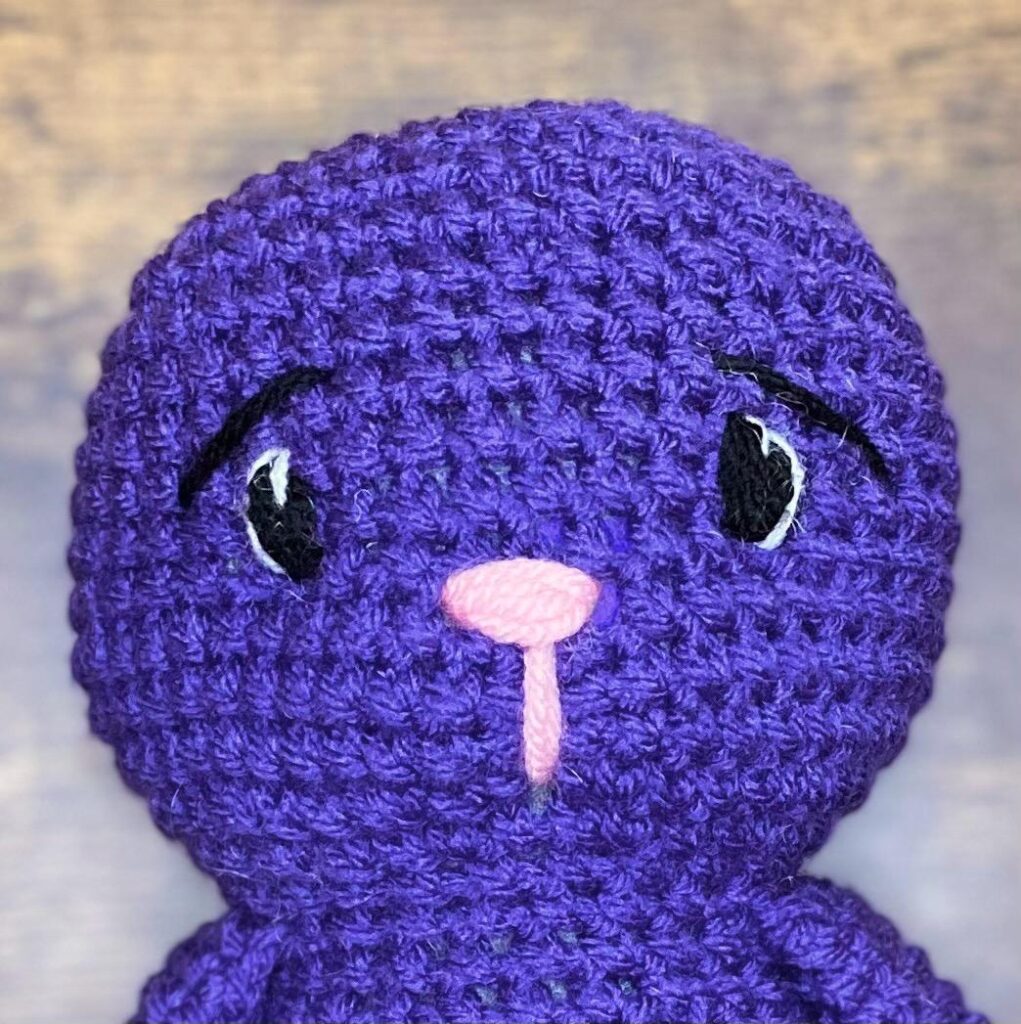
With Black, insert needle into the side of the head and come out where the st for the eye socket was made. Make sure there will be 7 or 8 sts between eyes. Insert needle two rows directly above. Make 5 more st making sure to line up your sts and not overlap them. After you make the last st take through to the other eye socket and repeat. If you want eyebrows, after the last st come out two sts to the outside of the eye. Follow the photo or video for placement.
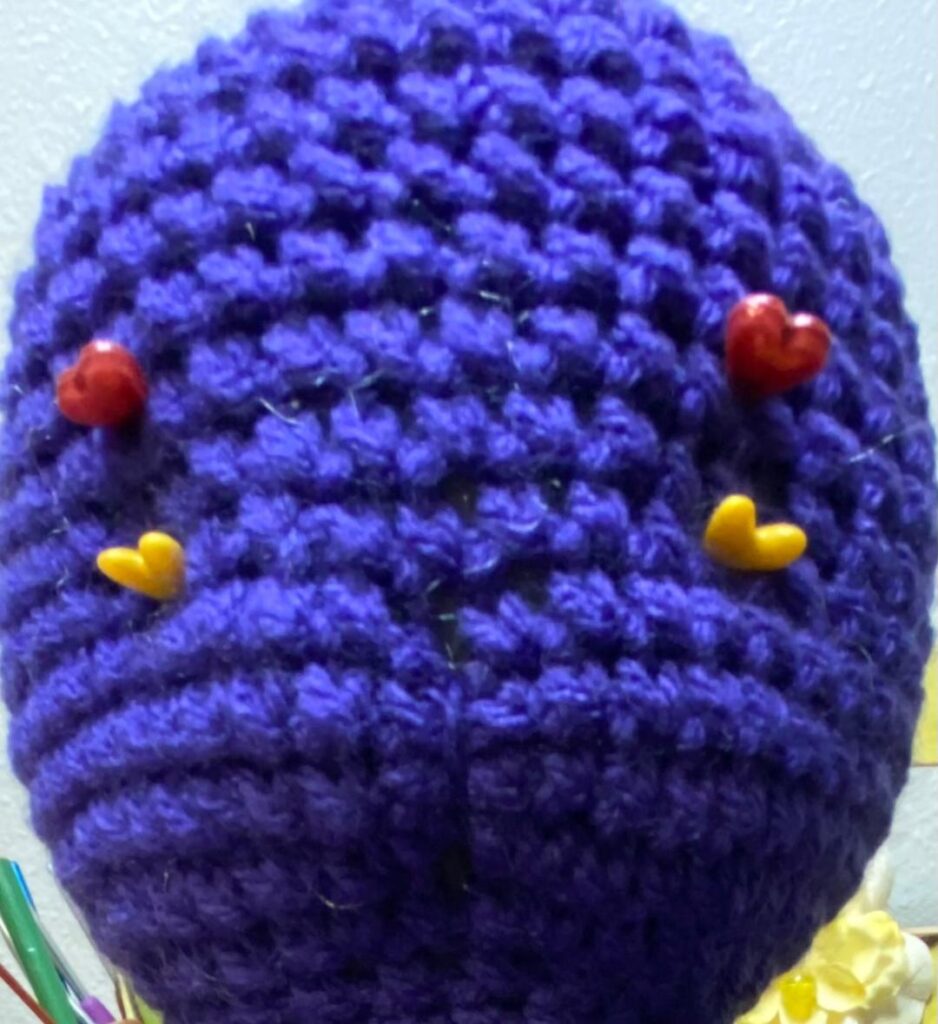
With White, make eye accents by making one stitch on the outside of each eye and a stitch from the top center st to the center of each eye.
Nose/Mouth/Cheeks
With Pink, stitch a mouth from R27 up to R32-33 (2 sts), then stitch a nose over the top of the mouth. Be sure to center the nose between the eyes. I made about 6 sts. If you want cheek accents, make 2 st under each eye.
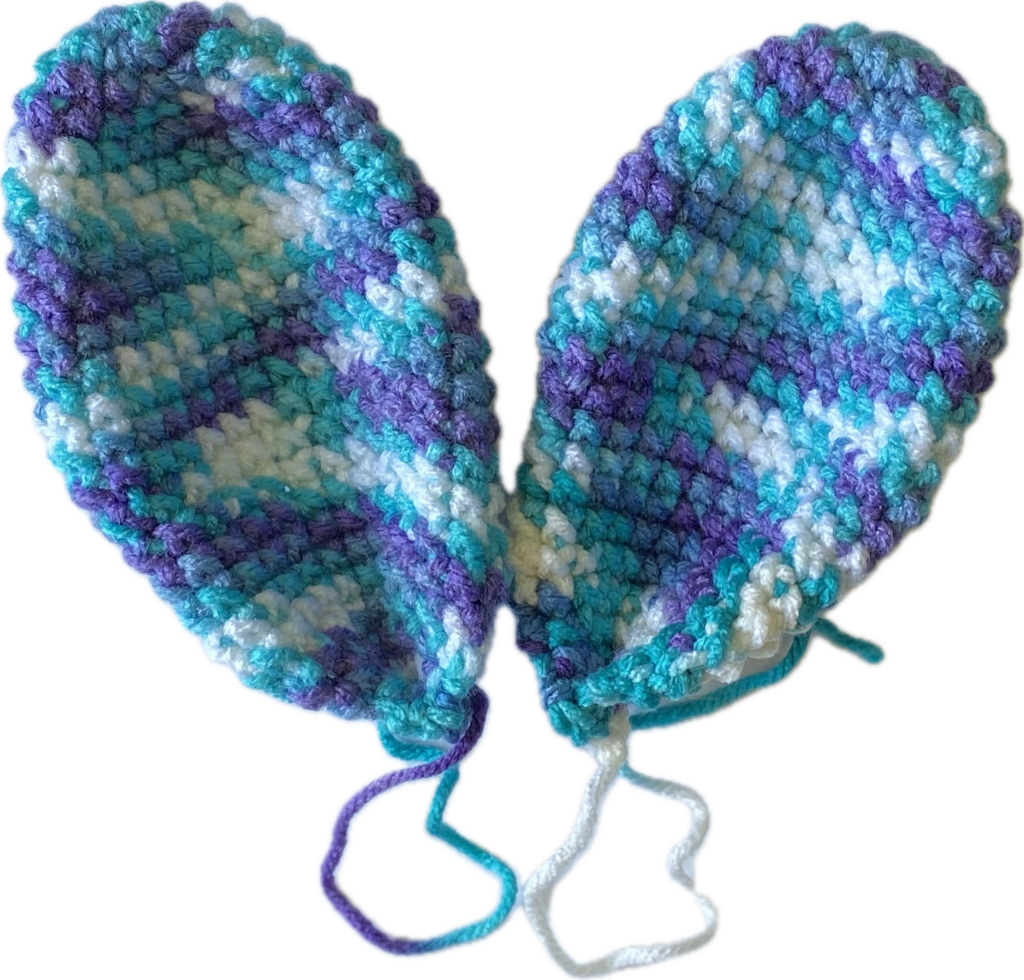
Ears
Make 2
R1: With Ears, MR 6SC (6)
R2: INC around (12)
R3: *SC, INC* around (18)
R4: SC around (18)
R5: SC, INC, *SCx2, INC*x7, SC (24)
R6-8: SC around (3 rnds of 24)
R9: *SCx3, INC* around (30)
R10-14: SC around (5 rnds of 30)
R15: *SCx3, DEC* around (24)
R16-20: SC around (5 ends of 24)
R21: SC, DEC, *SCx2, DEC*x7, SC (18)
R22: *SC, DEC* around (12)
R23: Pinch together and SC across (6)
R24: Pinch sides together and SC across (3)
Tie off leaving a long tail.
Tail
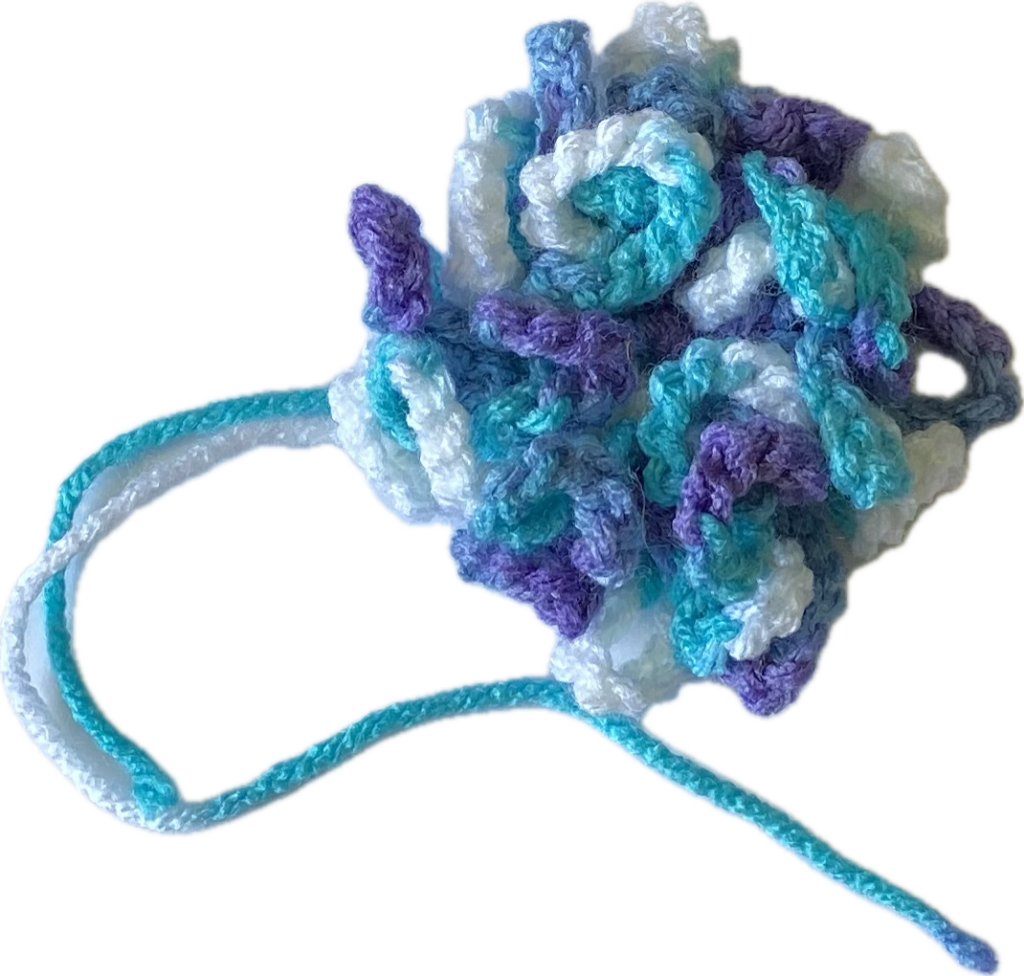
R1: With Ears, MR 12SC (12)
R2: CH12. Working in the back loops of R1: *SC in next st, CH12* repeat *-* around. (12 loops)
R3: CH12. Working in the front loops of R1: *SC in next st, CH12* repeat *–* around, ending with a SC in the last st. (12 more loops)
Pull MR closed. Cut a long tail and tie to the MR tail in multiple knots. Using the longer tail, sew onto the back of the bunny at R9-11. Weave in ends.
Sew ears onto the top of the head at the 2nd round from the top center. I attached them using the front and back sts separately. After attaching each ear, attach the ears together in order for them to stand up. If they need more stability, use more sts where needed.
Your FlopZ is complete!
I hope you have enjoyed making this free bunny crochet pattern for FlopZ the Chubby Bunny! If you have any questions about this pattern, leave a comment below or contact me on social media.
Be sure to tag me on social media so I can see your creations 🙂
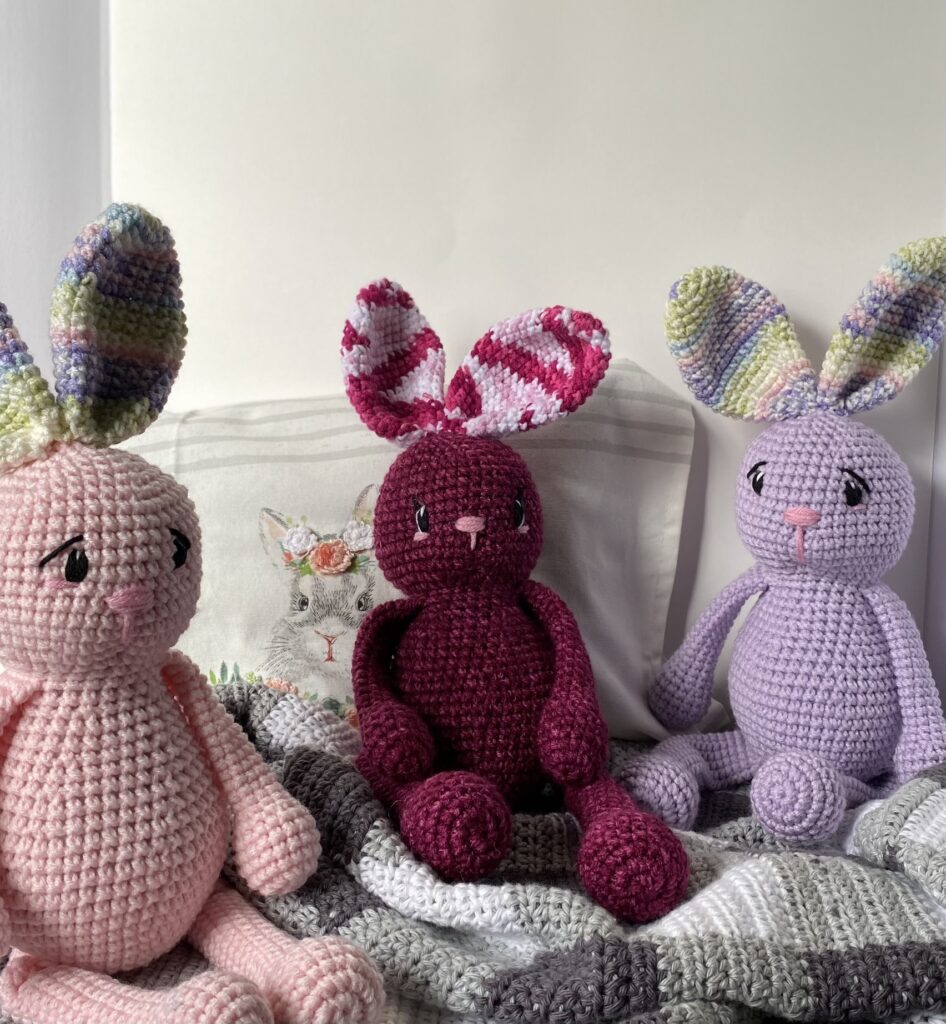
Want more FREE bunny patterns? Check out LopZ the lop-earred bunny or this Bunny Lovey!
