French Patriotic Boy Crochet Pattern: 2024 Paris Olympics Edition
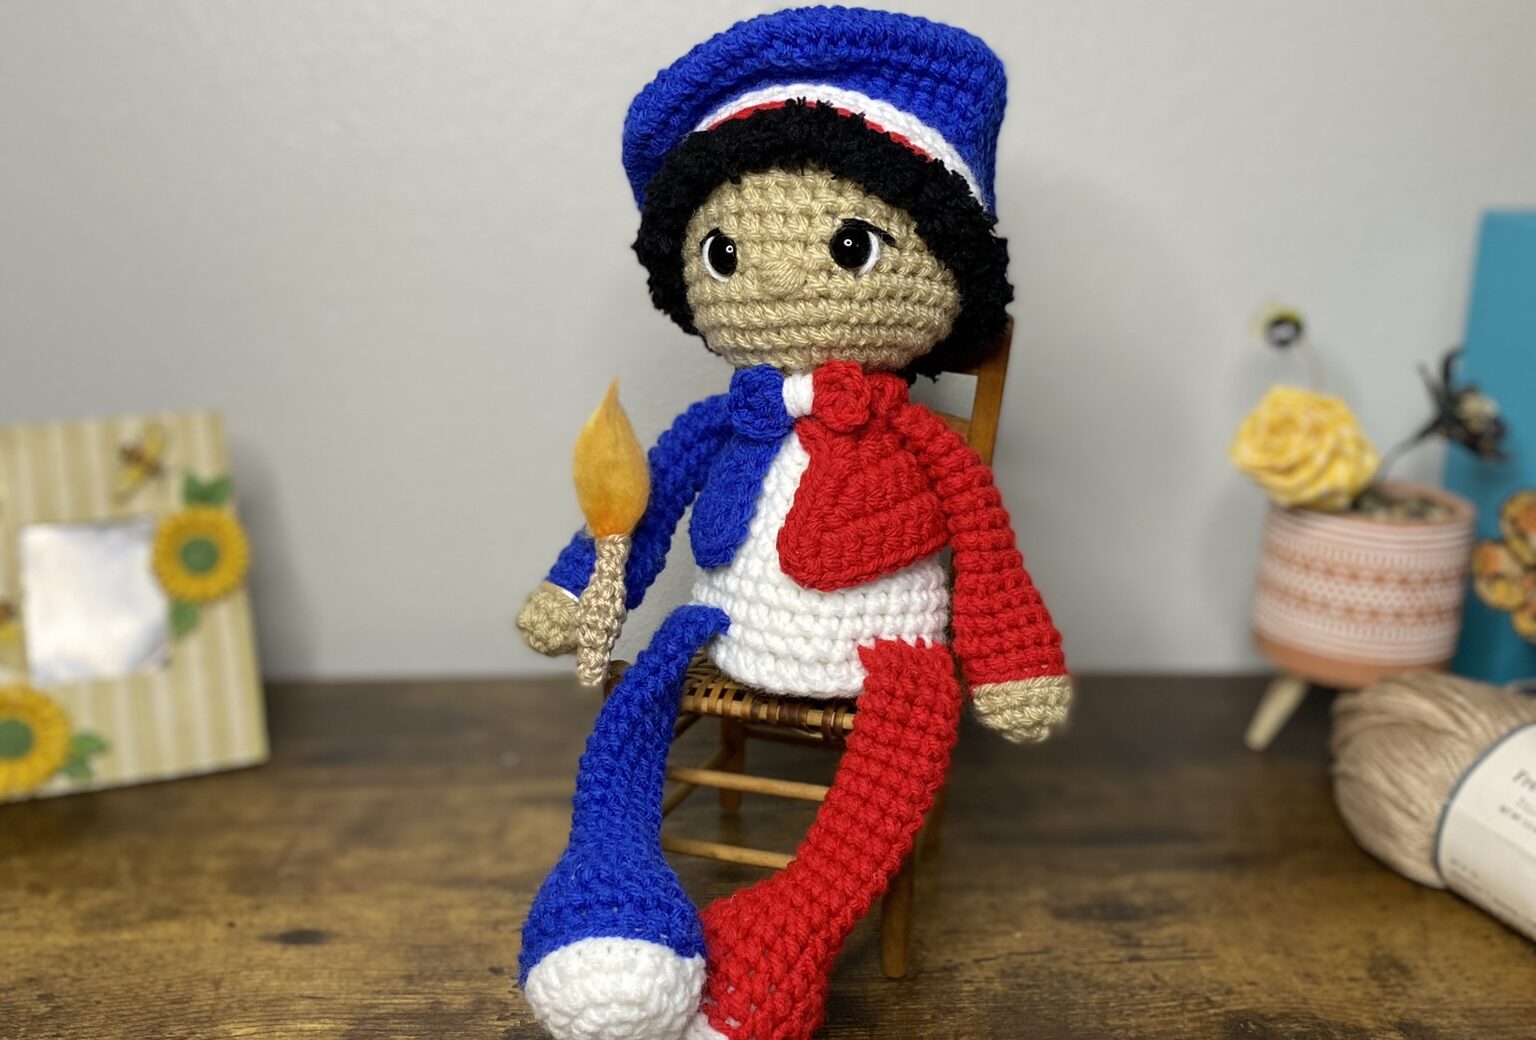
Do you watch the Olympics? I have watched them since I was little. Now I don’t watch all of the games, but I do enjoy some of them. The opening ceremonies in different countries are definitely a sight to see! While revising my Patriotic Boy pattern, I had in mind to make different boys for different countries. A French Boy crochet pattern was a must for the 2024 Olympics.
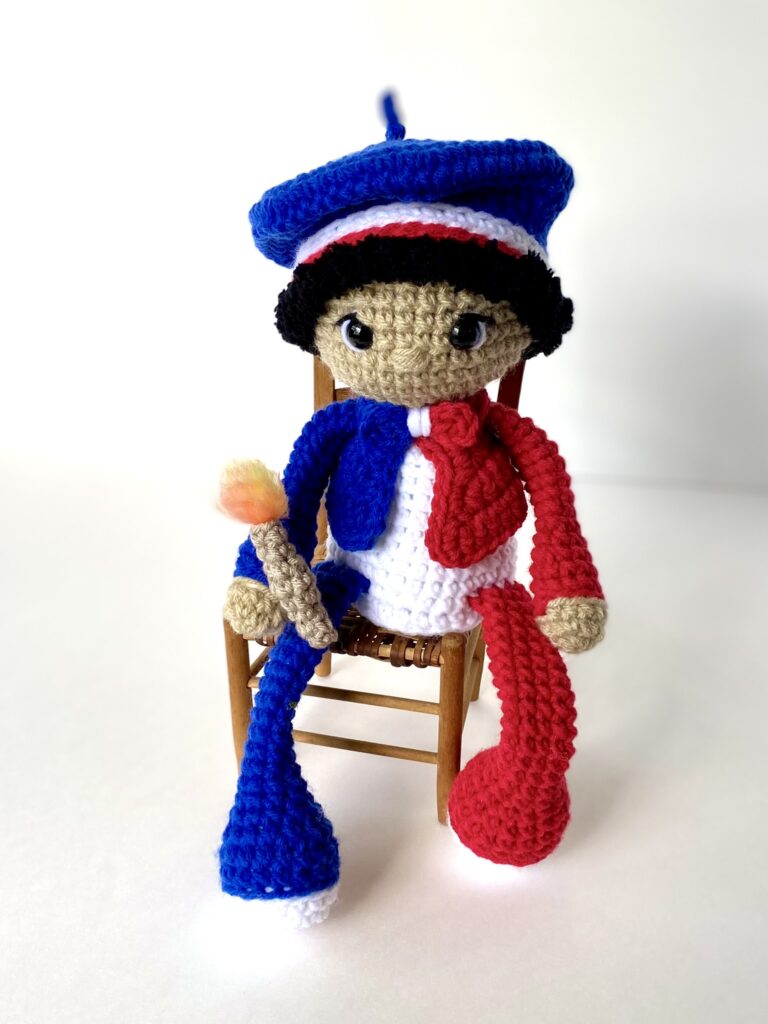
One of my world testers (@anaisll28) actually made a French mod of my pattern and came up with this color scheme. She gave me her permission to use this awesome color change idea in this pattern. Add in a beret and Olympic torch and Voila… the cutest French Patriotic Boy crochet pattern ever!!
Did you know the Olympic torch is made new for each Olympic Games? I did not. So this pattern is fashioned after the 2024 Paris Torch. Below is a photo and a link to a very interesting article on the design and designer.
For this pattern modification, you will need to purchase the original Patriotic Boy Shelf Sitter pattern available in my Etsy shop.
Instructions for the modification below include the changes to the original pattern needed as well as the pattern for the beret and torch. Words in italics indicate a repeat.
Supply Changes
Use the same colors as pattern.
I used:
Flesh– Red Heart Super Saver: Buff
Red– Mainstays 100% Acrylic: Red
White– Mainstays 100% Acrylic: White
Blue– Mainstays 100% Acrylic: Blue V
Hair: you will need a thin furry or eyelash yarn. I used a yarn I got from Alliexpress
Torch: Choose a lighter weight/thinner yarn such as cotton or baby yarn in a champagne color. I used Yarn Bee Fresh Haven: Hummus and a 3.75mm hook
Flame: bright yellow and burnt orange
Brush for felting. I used a cat brush (unused LOL!!)
Body Modifications
Arms and Legs:
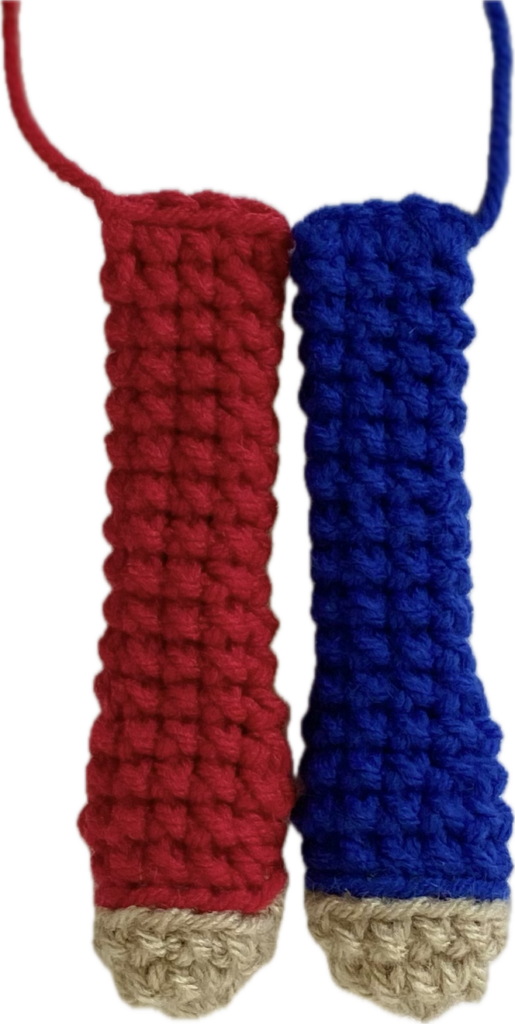
Follow pattern, making one arm and leg with Red and one arm and leg with Blue.
Body:
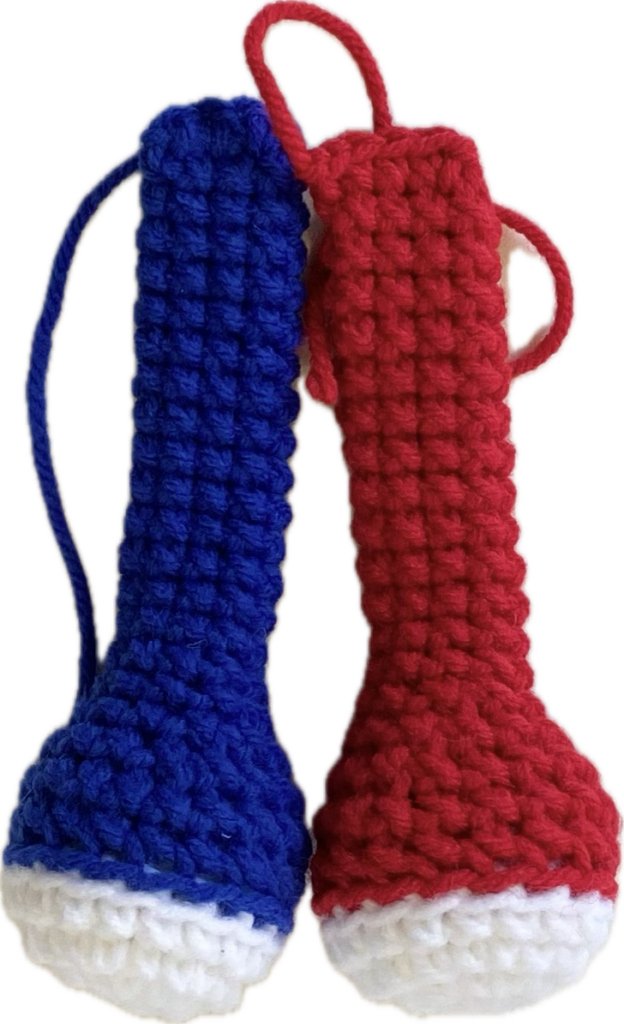
Follow pattern, making the whole body up to the head with White. When attaching the arms and legs, attach the Red one first and the Blue second.
Vest
I carried my yarn colors and it turned out great! You can choose if you want to carry them or trim and weave in ends.
R1: Start foundation ch with Red for 8 sts. Bring in Blue and make the last 8 sts.
R2: Start with Blue. Change to Red at the 3rd SC past the first armhole.
R3: Start with Red. Change to Blue after the 2nd INC.
R4: Start with Blue. Change to Red at the 3rd SC past the 2nd INC.
R5: Start with Red. Change to Blue at the 4th SC past the 2nd INC.
R6: Start with Blue. INC in the first st. SC in next 8 sts. INC in next st. SC in next 4. Change to Red. SC in next 4. INC in next st. SC in next 7 sts. INC in the last st. Ch1, turn. (32)
R7: Start with Red, SC in first 16. Change to Blue. Follow pattern and change back to Red at the top 7th SlSt. Finish according to pattern.
Bowtie
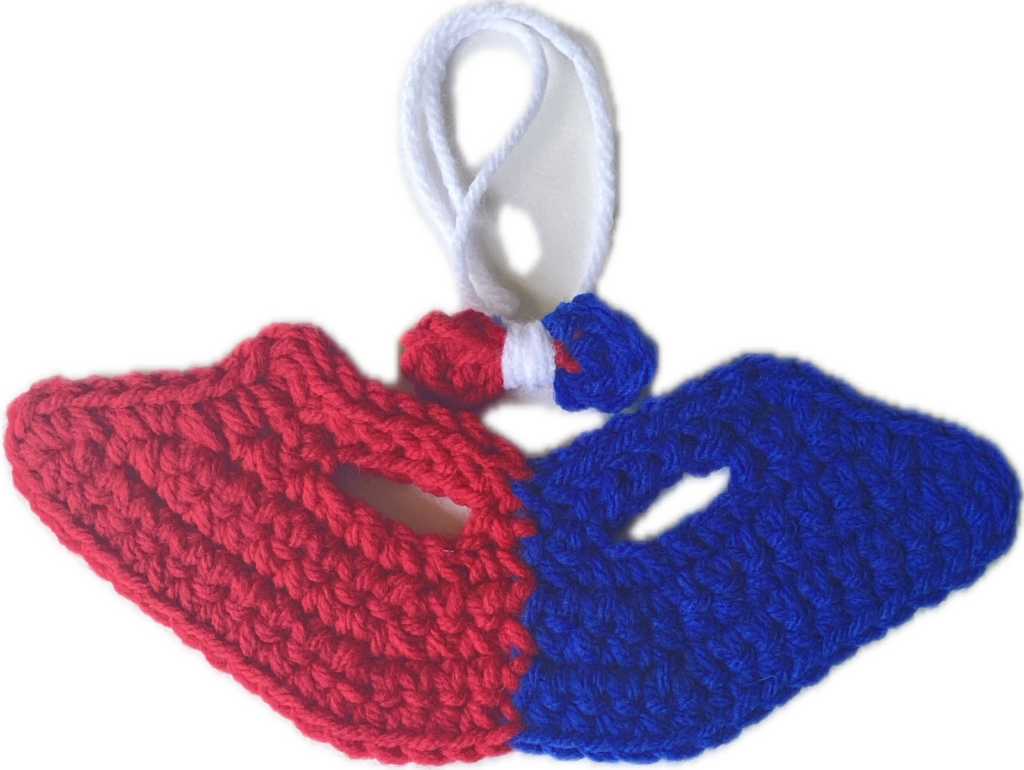
With Red and leaving a 3” tail, Ch5. YO and in 3rd ch from hook make 2 DC. Ch2 and sl st in same ch. Sl St into next ch.
Change to Blue. Ch2 and in last ch: YO and make 2DC,covering part of the tail. Ch2 and sl st in same ch.Sl St into center ch. Pull loop through. Cut 3” tail.
Cut a 6-8” piece of White and wrap each end around the center of the bow tie twice; each tail in opposite directions. Tie tails in a knot at the back of the bow tie.
Beret
Loosen tension and do not use the yarn under method.
R1: With Blue, MR, 6SC leaving a 2” tail
R2: INC around (12)
R3: SC, INC around (18)
R4: SCx2, INC around (24)
R5: SCx3, INC around (30)
R6: SCx4, INC around (36)
R7: SCx5, INC around (42)
R8: SCx6, INC around (48)
R9: SCx7, INC around (54)
R10: SCx8, INC around (60)
R11: SC around (60)
R12: SCx8, DEC around (54)
R13: SCx7, DEC around (48)
R14: SCx6, DEC around (42)
R15: SCx5, DEC around (36)
At this point, you will need to make sure the beret will fit over the head. It must be able to fit where the front is sitting above the eyes and the back is halfway down. If it does not, redo R15 with a looser tension and make sure to continue the pattern with that same loose tension.
Change to White using the clean color change technique
R16: With White, SC around (36)
Change to Red using the clean color change technique
R17: With Red, SC around. SlSt with the first SC and FO (36)
Stretch the beret and make sure it will fit over the head where the front is sitting above the eyes and the back is halfway down.
Cabillou:
With Blue, make a slip knot with a 2” tail. Ch4. SlSt in the 2nd ch from hook and in the remaining 2 chains. Cut 2” tail and pull through the last st. Tie ends together and pull through the MR to the inside of the beret. Tie ends with MR end. Trim.
Hair
Bring in Hair at the inside back of the beret, into the lower back loop of the last round. SC around in the lower back loops. Tie ends together and trim. Place onto head where the top is flattened on one side.
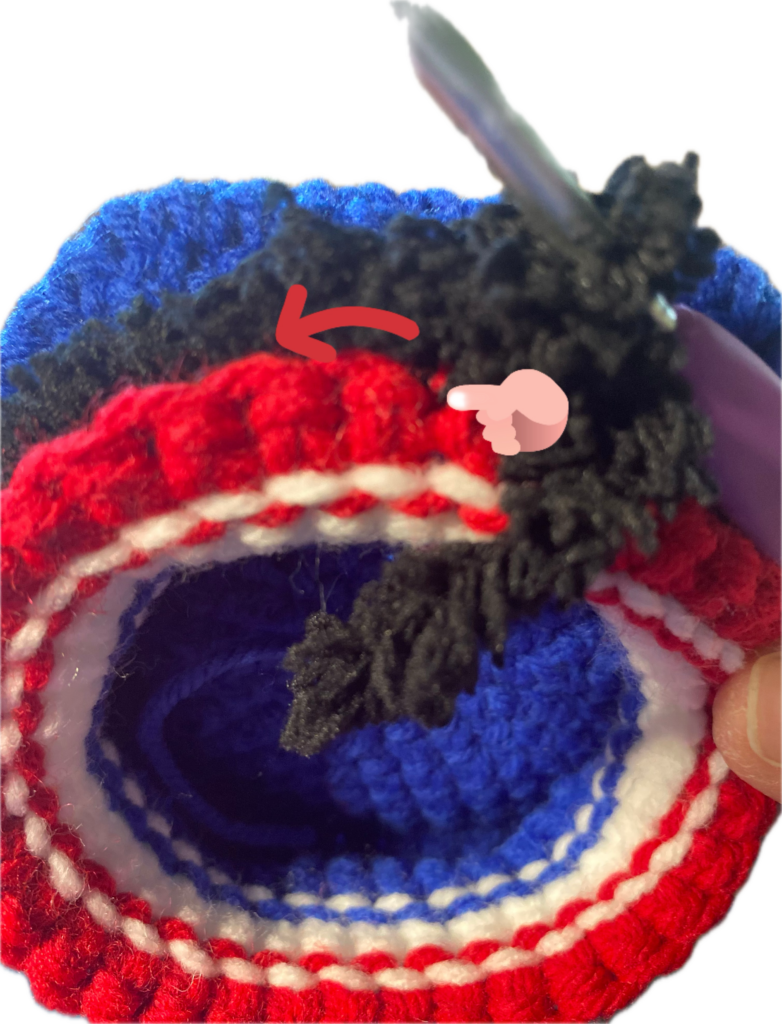
The beret should be snug enough you will not need to sew on, but if it is not or you choose to, feel free to sew the beret onto the head using Red.
Olympic Torch
R1: With Torch, MR 4
R2-3: Instead of tiny rounds, you will be continuously crocheting in the round: SCx8. Pull the MR tight and continue pattern going around the tail.
R4: SC, INCx2 (6)
R5-6: SC around (6) Pull the MR tail to the outside between R5-6
R7: SC, DECx2 (4)
Stuff the torch as best you can to give some definition.
R8-9: Instead of tiny rounds, you will be continuously crocheting in the round: SCx8. FO but do not close top. Thread the tail through a needle and thread back down through the top and exit out the same hole as the MR tail. You can either tie these two tails around the hand so that your boy can hold the torch, or tie a small hair elastic with the tails. (See video for visual.)
Torch Flame
Cut a length of Torch that is about 3xs the length of your torch. Decide on the length of your flame and double it. Cut 2-orange and 4-yellow. Lay out your piece of Torch and then lay the lengths of yellow and orange across the middle of it: yellow on the inside, orange on the outside. Tie the Torch around the flame in a TIGHT knot. Double knot it. Holding the Torch in one hand, use the brush and gently brush out the flame. When finished, you can twist it to a point if needed. Thread the ends of Torch in a needle and insert into the top of the torch. Exit out the bottom. Tie off and hide ends. Click here for a visual guide on my YouTube channel.
Place torch onto the hand of your patriotic using a piece of yarn or a tiny hair elastic and you are finished!
I hope you have enjoyed this free French Boy Crochet pattern mod! Be sure to follow me on social media or subscribe to my email list to make sure you don’t miss any free patterns.
To see all mods for the Patriotic Boy pattern: click here.
