FREE Crocheted Pumpkin pattern
Enjoy this FREE crocheted pumpkin pattern by me, the WhimZ B!
I love Fall!
Fall is not only a season… it’s a mindset! There comes a point in the dog days of summer where even though it’s 100 degrees outside, lovers-of-Fall will turn up the AC, don their favorite sweater, light their favorite fall candles and start putting out their pumpkins! I am one of those people! Here in Arkansas, we recently enjoyed several days of lower temps and humidity and it felt like fall. So fall crochet projects were on the hook!
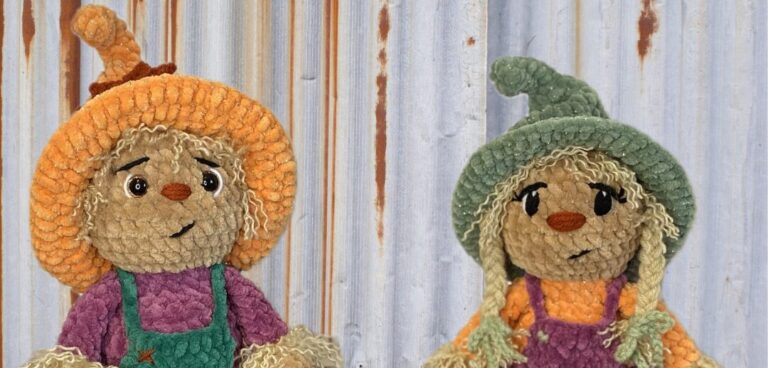
Of course the first project were my Plush Scarecrows. Those have been on my hook for awhile. Next on the hook were some pumpkins. A friend of mine had seen a set of Minnie and Mickey pumpkins on Facebook and asked if I could crochet her some. I had actually been wanting to design a pumpkin pattern, so I accepted the challenge!
About this pattern
This… pattern… is… SOOOOO EASY!!!!
It is beginner friendly and can be made with ANY yarn!
This is not a tiny pumpkin. It is more of a medium size that is about 6″ wide and about 4 1/2″ tall without the stem. The bulkier the yarn, the smaller the pumpkin.
The pattern consists of repeated rows of single crochet and half-double crochet all worked in the back loops. This creates almost a “knitted” look and is stretchy. You basically crochet a “panel” and then sew the ends together (in a special way so as to “hide” the seam).
I use the “yarn under, yarn over” method to reduce the size of the holes between stitches.
When I say it’s easy, I mean E.A.S.Y. It is also the perfect mindless project. That was a nice change after designing the scarecrows!
Need some inspiration? Want to know my thoughts on chunky yarns? Scroll to the bottom of this post or click on the Quick LInks to see my notes on the 3 pumpkins I made.
Supplies
- Any yarn
- Appropriate hook for your chosen yarn
- Measuring tape
- Stuffing
- Long yarn needle and short yarn needle
- Scissors
- Stitch Markers
Terms and Abbreviations
BLO: back loop only
CH: chain
FO: fasten off
HDC: half double crochet
INC: increase
MR: magic ring
R: row(s)/ round(s)
SC: single crochet
SLST: slip stitch
ST(S): stitch(es)
Important!!! Please Read.
- The stitch marker is a visual to let you know you are working the HDC side.
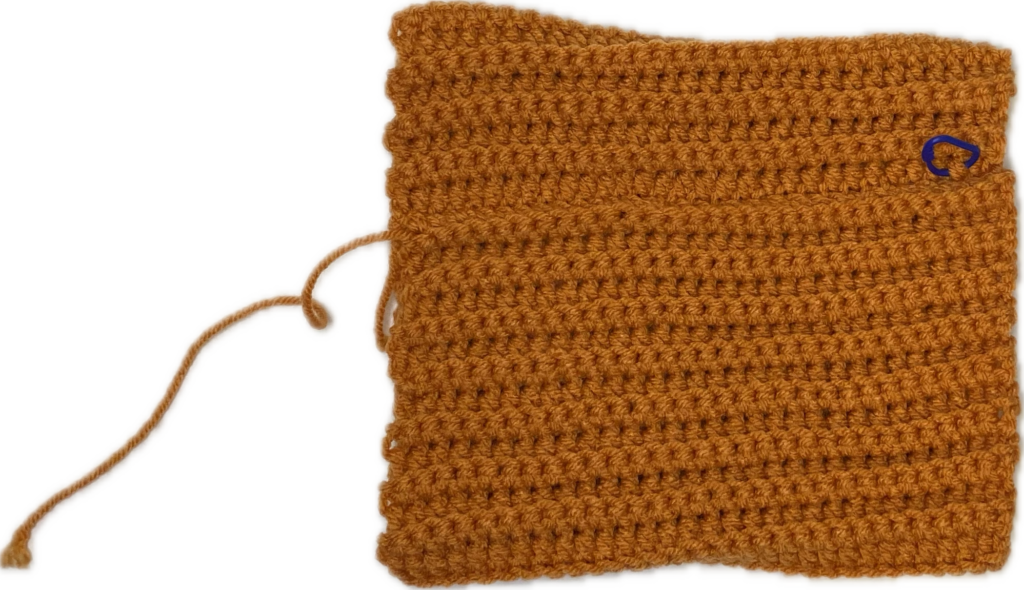
- The side with the stitch marker is the “right” side of your panel. On the “right” side of your panel the HDC rows will be behind your raised rows of SC. These raised rows create “ridges” in the pumpkin.
- Be sure to count your sts every few rows to make sure your panel doesn’t wind up distorted (or you can use stitch markers or a piece of yarn.)
Now for the super easy part… the pattern!
Pumpkin:
Make a slip knot and make an odd number chain that is approx. 7″. Make sure to note your st count.
For every row from here on out, you will be working in the BLO.
***In the second ch from hook and in each st across, HDC in the back loops. Ch1, turn.
Place a stitch marker in the front of one of those HDCs.
***SC in the BLO across. Ch1, turn.
Repeat those (***) two rows until your panel is approx. 12 1/2″ long. FO and leave a long tail to sew the sides together and gather the bottom. (I cut a tail that was length of the short side Xs 3.)
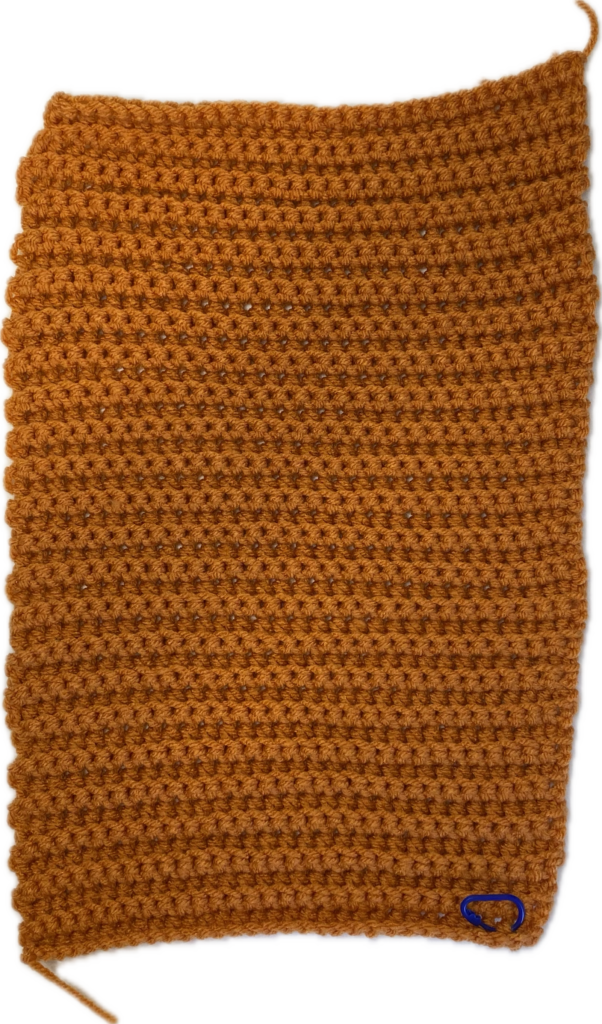
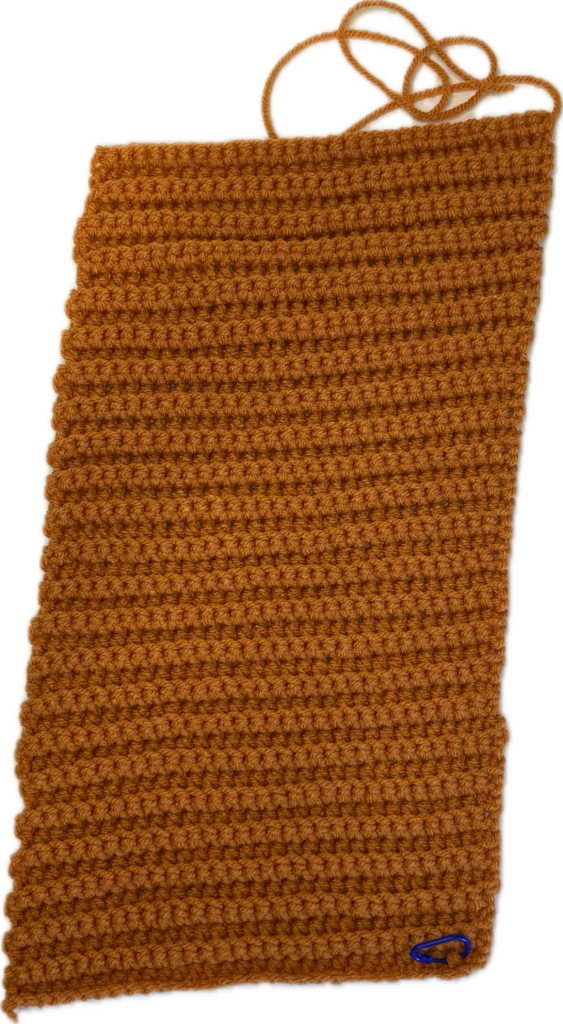
Sew up the Seam
Make sure to keep the side with the stitch marker is on the outside.
If using plush yarn, I recommend using a coordinating acrylic to do the sewing to avoid breakage as you will be pulling tightly.
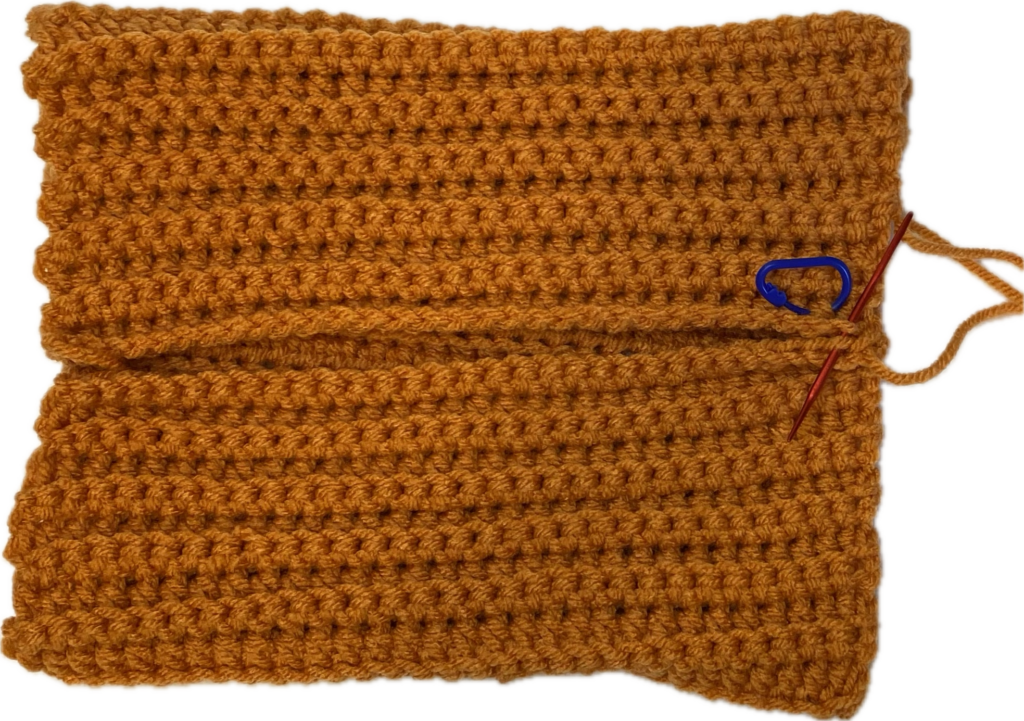
With the right side out (the side with the stitch marker), fold your panel in half with the short ends together. Using your short yarn needle, whip stitch together by going through the front loops of the HDC row (where your stitch marker is) and the back loops of the SC row on the opposite side. This creates the last SC ridge and a seamless look. When you come to the end, tie in a knot. You will be using the rest of the tail to gather the bottom. Just make SURE you knot the tail before you begin to gather.
Gather the Bottom
Now thread the tail through your long yarn needle.
Run it through the top stitches of the SC row ridges.
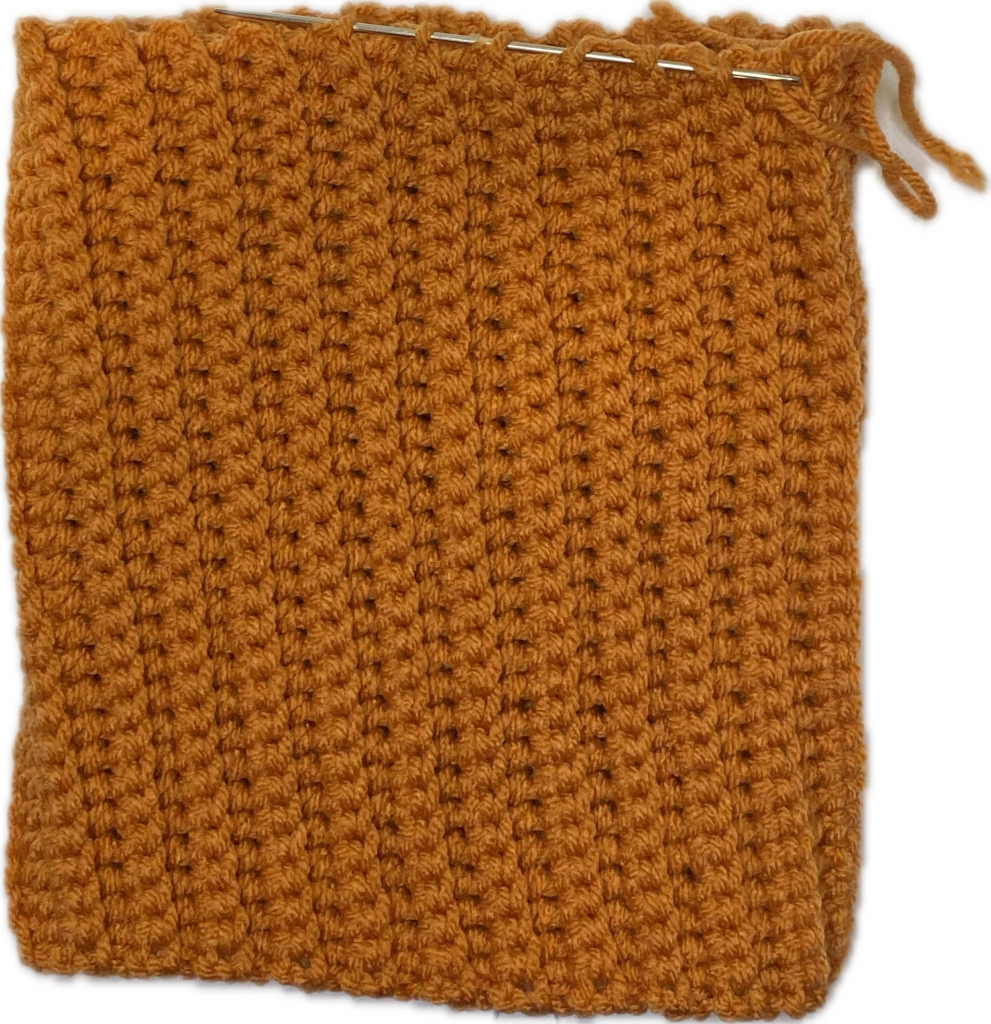
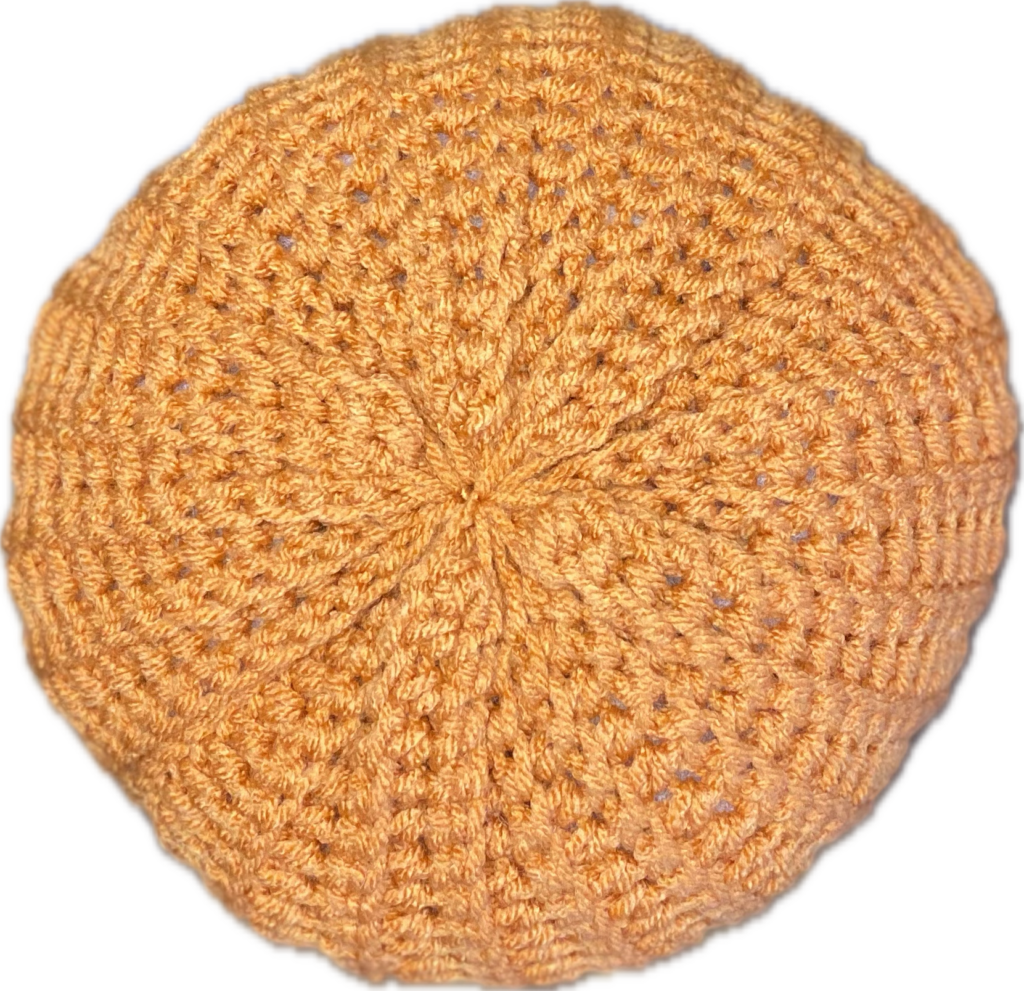
Pull tight to close. If it doesn’t close all the way, pull as tight as you can. Hold it in place, then use your threaded needle to go around the hole again. Pull tight. If it is still not closed, make some cross stitches. Take the needle through to the inside and tie in a knot.
Stuff the Pumpkin
These pumpkins eat a LOT of stuffing!!! Prepare yourself for their massive appetite. You may also need to do quite a bit of squishing and shaping to get the look you want. Just be careful not to overstuff! I did this with my first few I made and the stuffing shows through.
Gather the Top
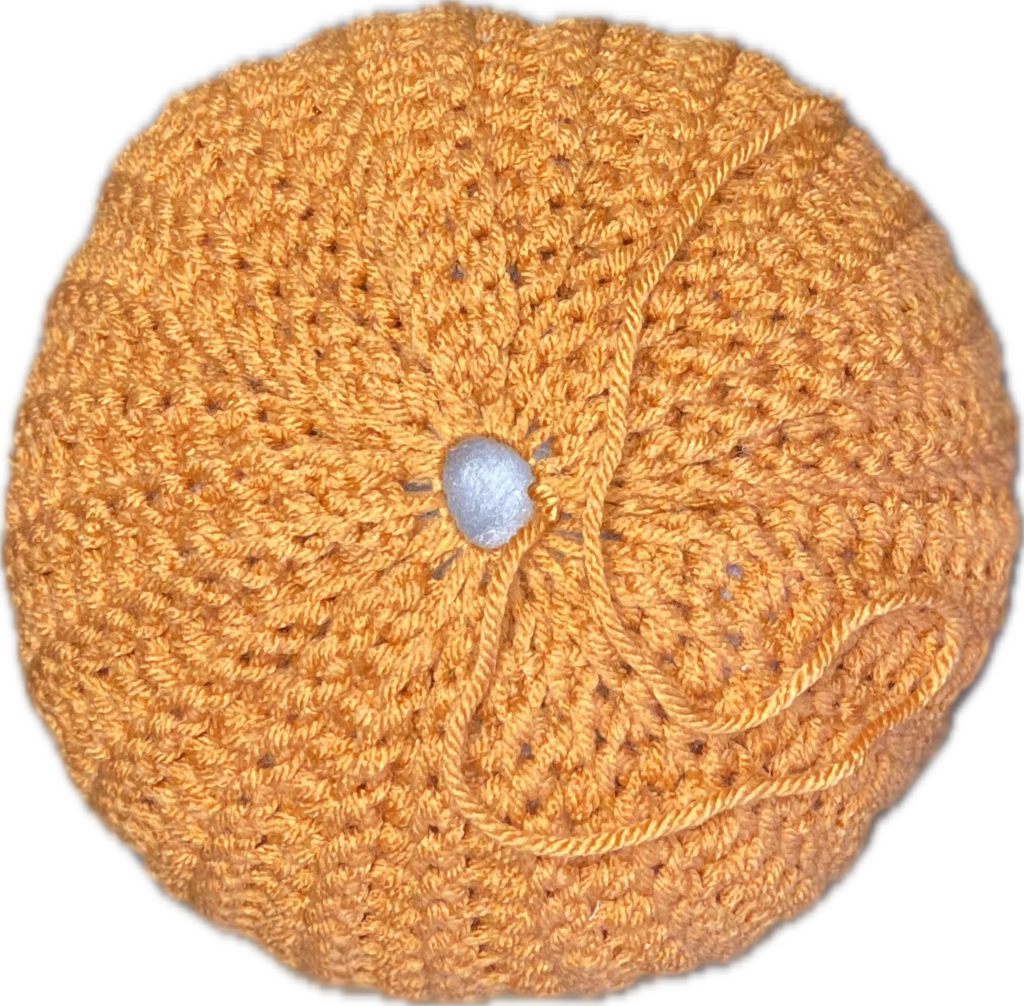
Gather the top by running your long needle through the tops of your SC ridges. Do not close the hole completely. Add more stuffing through the top if needed. After stuffing the pumpkin, you may need to close the hole a bit more so that your stem will cover it. Use the same method as mentioned above for the bottom.
Adding more character to your pumpkins
Ribs (optional):
If you want to create ribs on your pumpkin, tie the end of your yarn onto the top of your pumpkin and wrap around the pumpkin. You can decide how many ribs you like. When finished, tie the end to the top and stuff the ends inside the pumpkin.
Crocheted Stem:
R1: Make a MR with a 6″ tail. 8SC in the MR (8)
R2: In the BLO: HDC around (8)
R3: In the BLO: SC around (8)
R4-?: Repeat R2 and R3 until you have the length you want for your stem.
Last 2 rounds:
- *SC, INC* around (12)
- *SCx2, INC* (16)
SlSt into the next st. Do not FO. Continue to Curly Tendrils.
Curly Tendrils:
Make 1 or 2:
Ch as many as you did for your beginning chain of your pumpkin (or for shorter tendrils, chain half the total).
HDC (if using chunky yarn, SlSt instead of HDC) in the second ch from hook and in each st back up the ch. SlSt into last ch.
Cut a long tail and sew the stem over the hole at the top of your pumpkin. Before closing completely, pull MR tail out and give it a slight tug so as to indent the top of the stem and give it a curve.
You can also give a whimsical look to your stem by twisting it and tacking it as you twist.
Inspiration and my notes
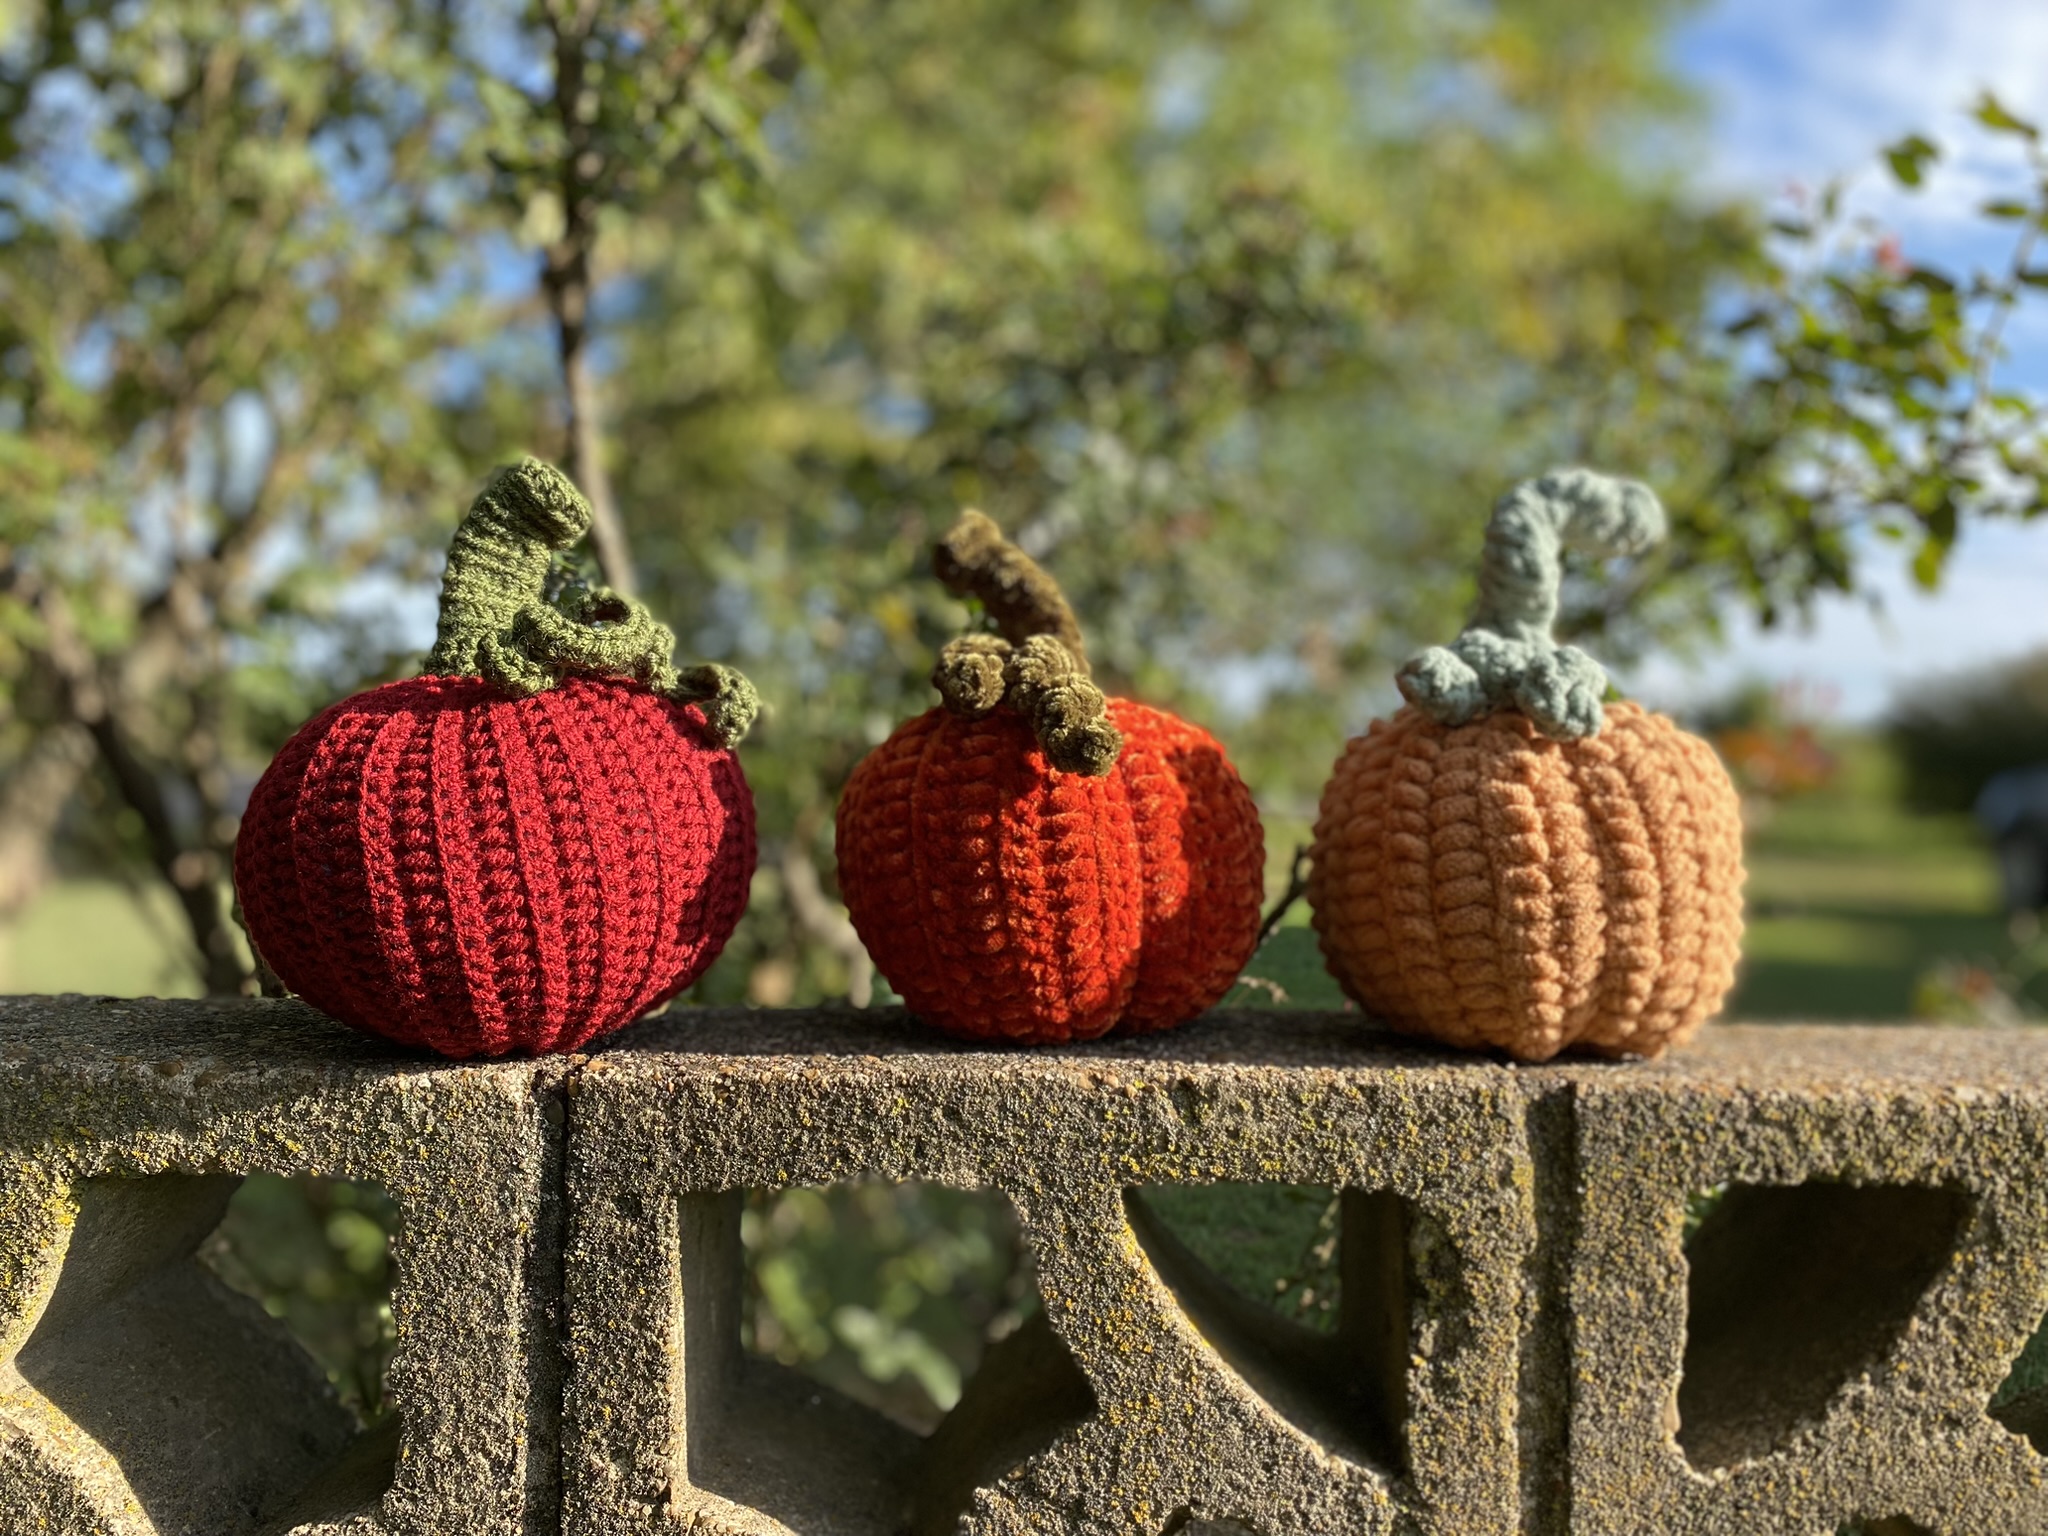
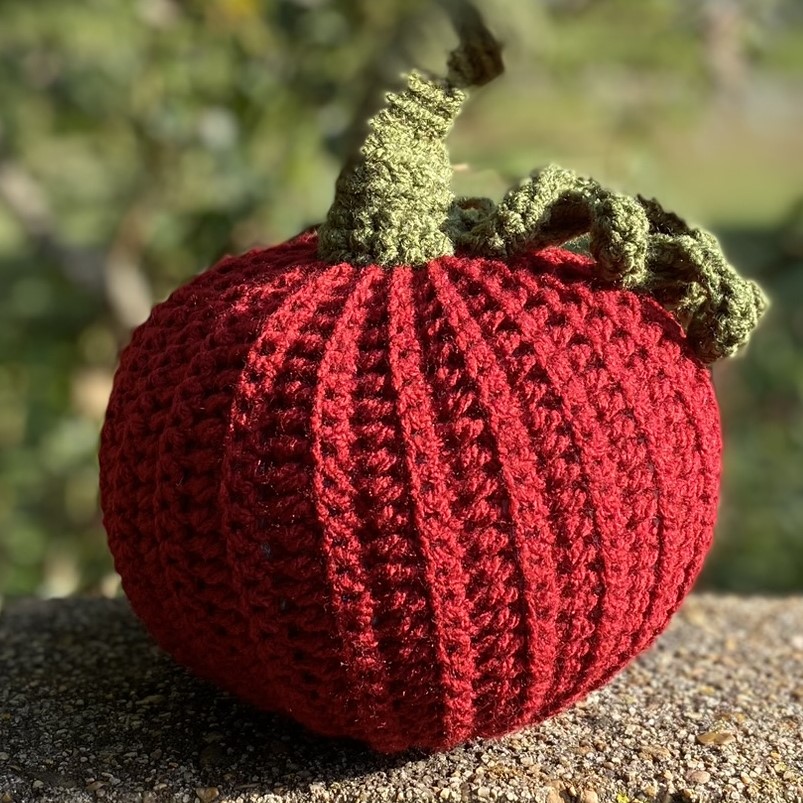
- Premier Just One Pound in Garnet and Forest
- 4mm hook
- Beginning ch: 31 sts
- Total rows: 46
- Stem and Tendrils: no changes
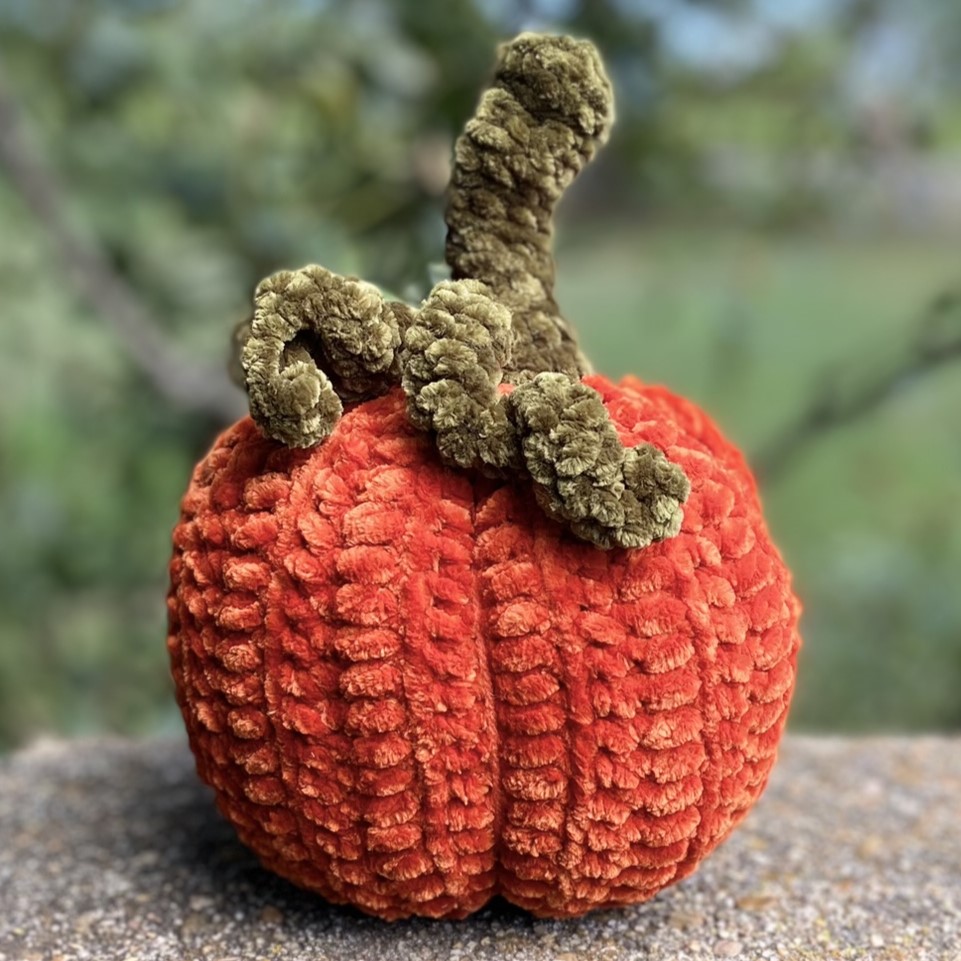
- Yarn Bee Velvety Smooth in Pumpkin and Olive
- 4.5mm hook
- Beginning ch: 24 sts
- Total rows: 30
- Stem: made as directed and twisted
- Tendrils: made 1 as directed and 1 is half sized
- 4 ribs
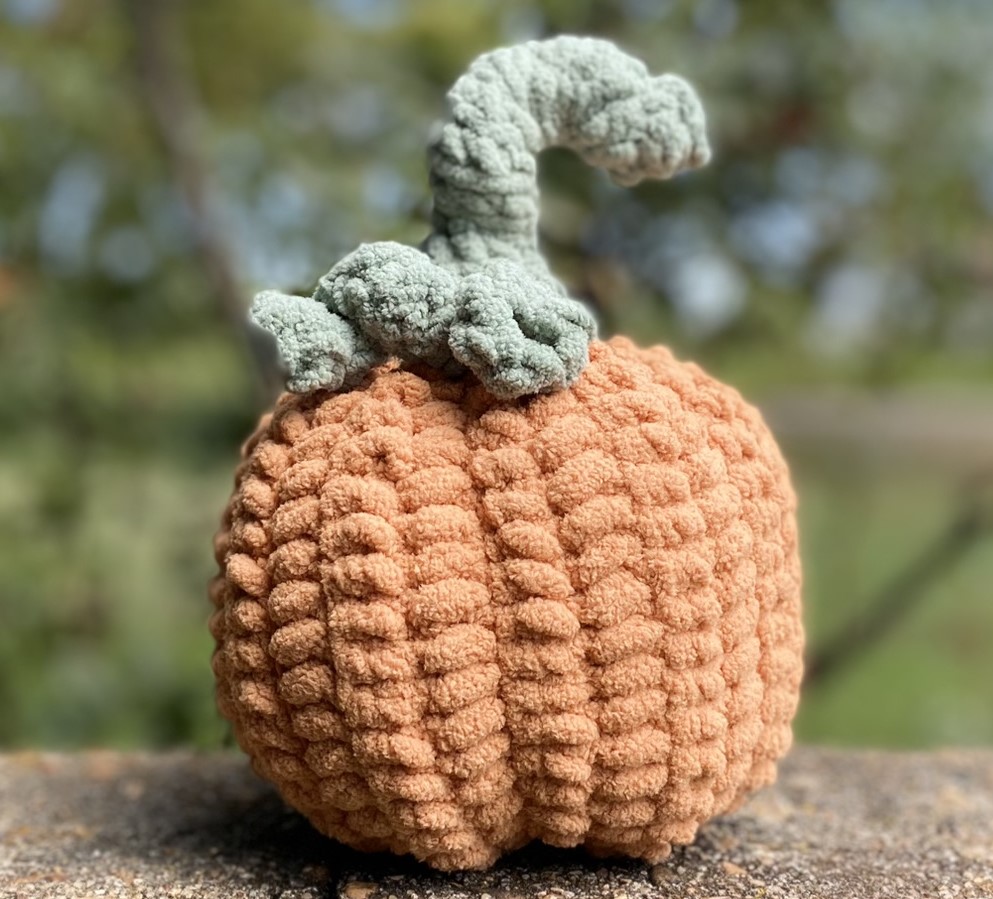
- Yarn Bee Cozy Occasion in Butterscotch Medallion and Sage
- 5.5mm hook, but should have used a 6
- Beginning ch: 20 sts
- Total Rows: 24
- Stem: made using SC only (no HDC)
- Tendrils: made both 1/2 size using SlSts instead of HDC
- 6 ribs
A note on the yarns I used:
The Premier Just One Pound yarns were purchased at my local Dollar Tree. They are a fantastic buy at $5 a skein. I liken the texture to be between Red Heart Super Saver and I Love This Yarn. I really like it!
Both Yarn Bee yarns are from Hobby Lobby. I REALLY LOVE the Velvet yarns!! They have such rich hues and the quality is wonderful! I compare it to the same thickness as Premier Parfait Chunky (my preferred yarn of choice). The Cozy Occasion is also quality yarn. It is comparable to Bernat Blanket yarn.
Personally, if I were to make more pumpkins using the chunkier yarns, I would make them bigger with the beginning chain at 10 1/2″ and the panel 19″ long.
That’s it! You have completed your pumpkin!!
How many pumpkins will you make using this free crocheted pumpkin pattern? What yarns will you try out? Please tag me on social media so I can see your wonderful pumpkins!!
Click here to see all things PUMPKIN from me, the WhimZ B!
